Install Ironwood and run your first review.
Start the self-hosted package, create the first Admin, connect the services your review needs, then run Ironwood against your own code.
You can return to Documentation → Getting started at any time. The evaluation setup page is temporary; this guide stays available.
You need Docker Desktop running, access to a GitHub or Azure DevOps repository, and credentials for the AI provider or providers you want to use. Windows and macOS are supported, including Apple Silicon and Intel Macs.
1. Download the evaluation
After verifying your work email, download the current evaluation package and copy the evaluation code shown on the setup page. If you return later, use Continue evaluation to receive a fresh magic link and get back to the latest download.
2. Start Ironwood
Extract the package first, then run the command for your operating system.
.\START-EVALUATION.cmdbash ./START-EVALUATION.shOpen PowerShell in the extracted Ironwood folder and run the command above. Do not double-click START-EVALUATION.cmd.
Reinstall Ironwood without reinstalling Docker
If you need to install Ironwood again, stop the existing Ironwood installation first. You do not need to uninstall Docker Desktop.
.\STOP-EVALUATION.cmdbash ./STOP-EVALUATION.shFor a completely clean reinstall, run docker compose --env-file .env down -v --remove-orphans from the old Ironwood folder. This removes Ironwood's local settings and review history.
Use Continue evaluation on the Ironwood Solutions website with the same email address. The magic link returns you to the latest download and provides a fresh activation code. Reinstalling does not restart the 30-day evaluation.
3. Create the first Admin and sign in
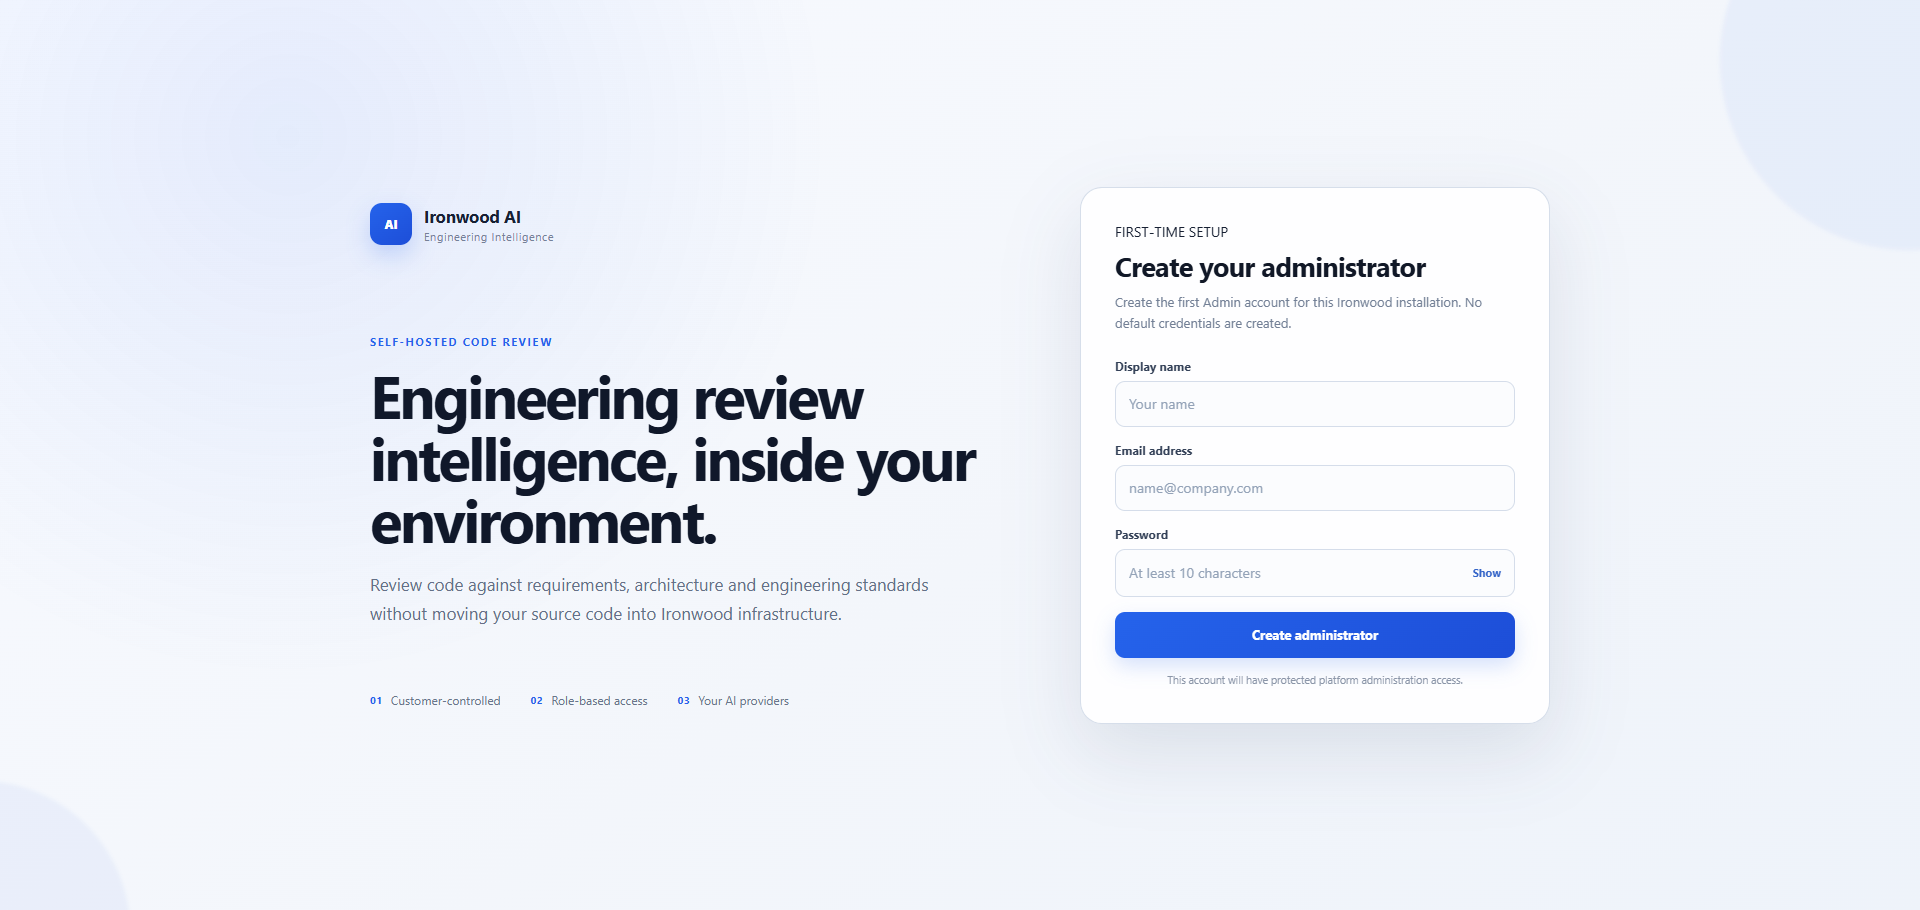
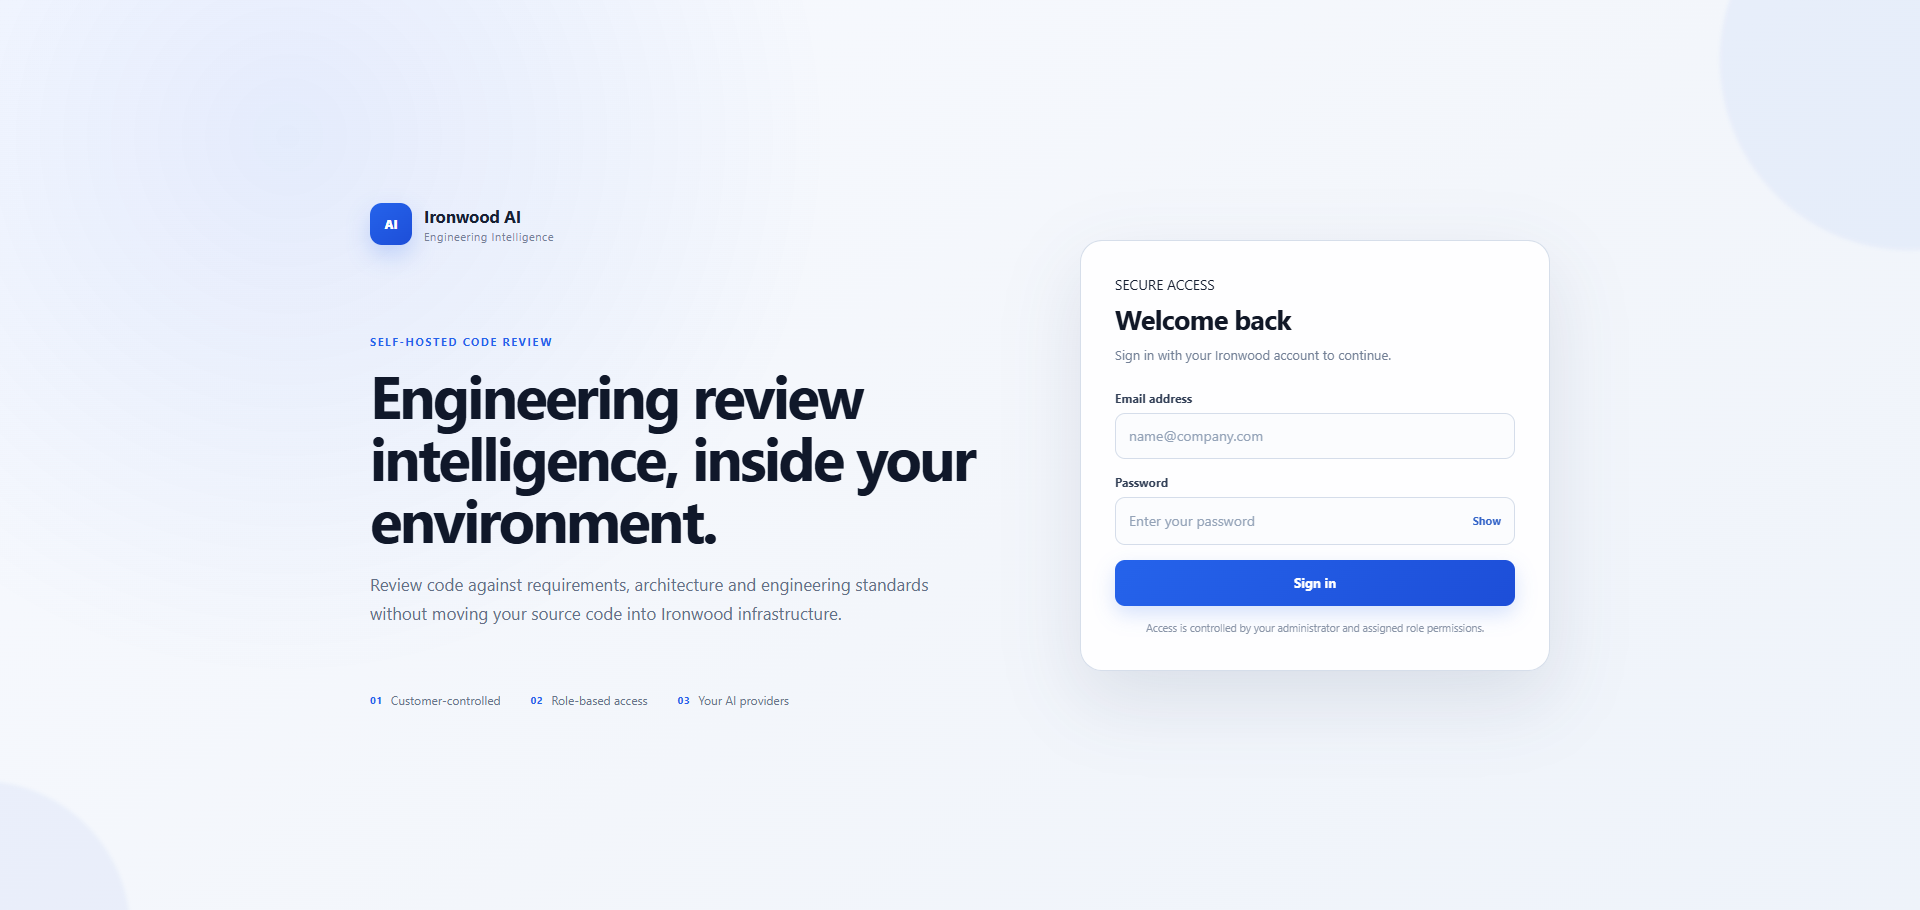
When the services are running, open http://localhost:3002. On a fresh installation, Ironwood asks you to create the first Admin account. Create the account, then sign in with those credentials.
4. Configure Source Control
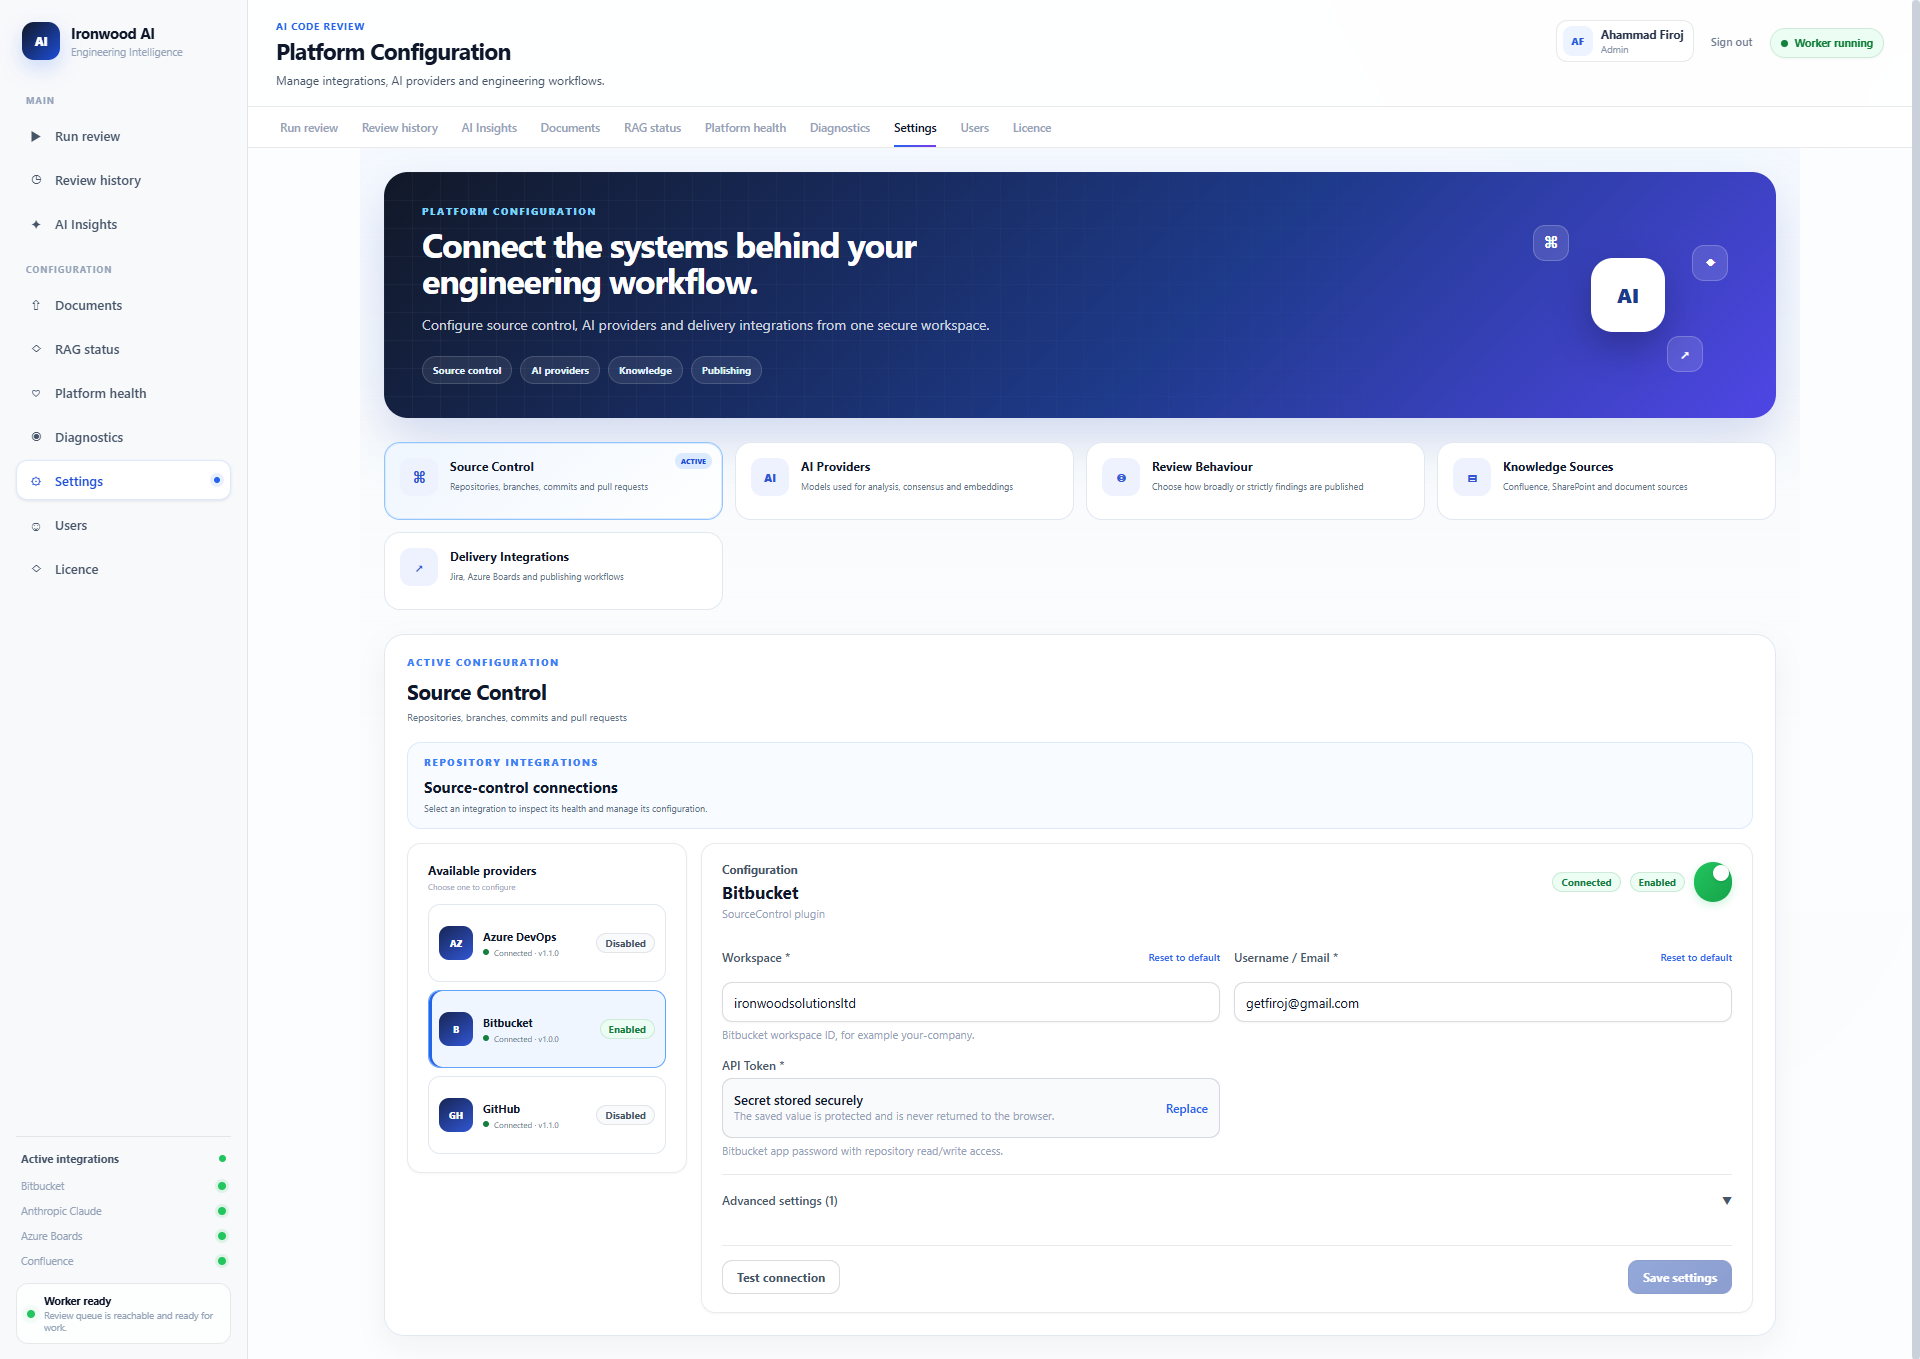
Open Settings → Source Control and configure GitHub or Azure DevOps. Test the connection, enable it and save. Ironwood uses this connection to load the repositories, branches and commits available for review.
5. Configure AI Providers and Consensus
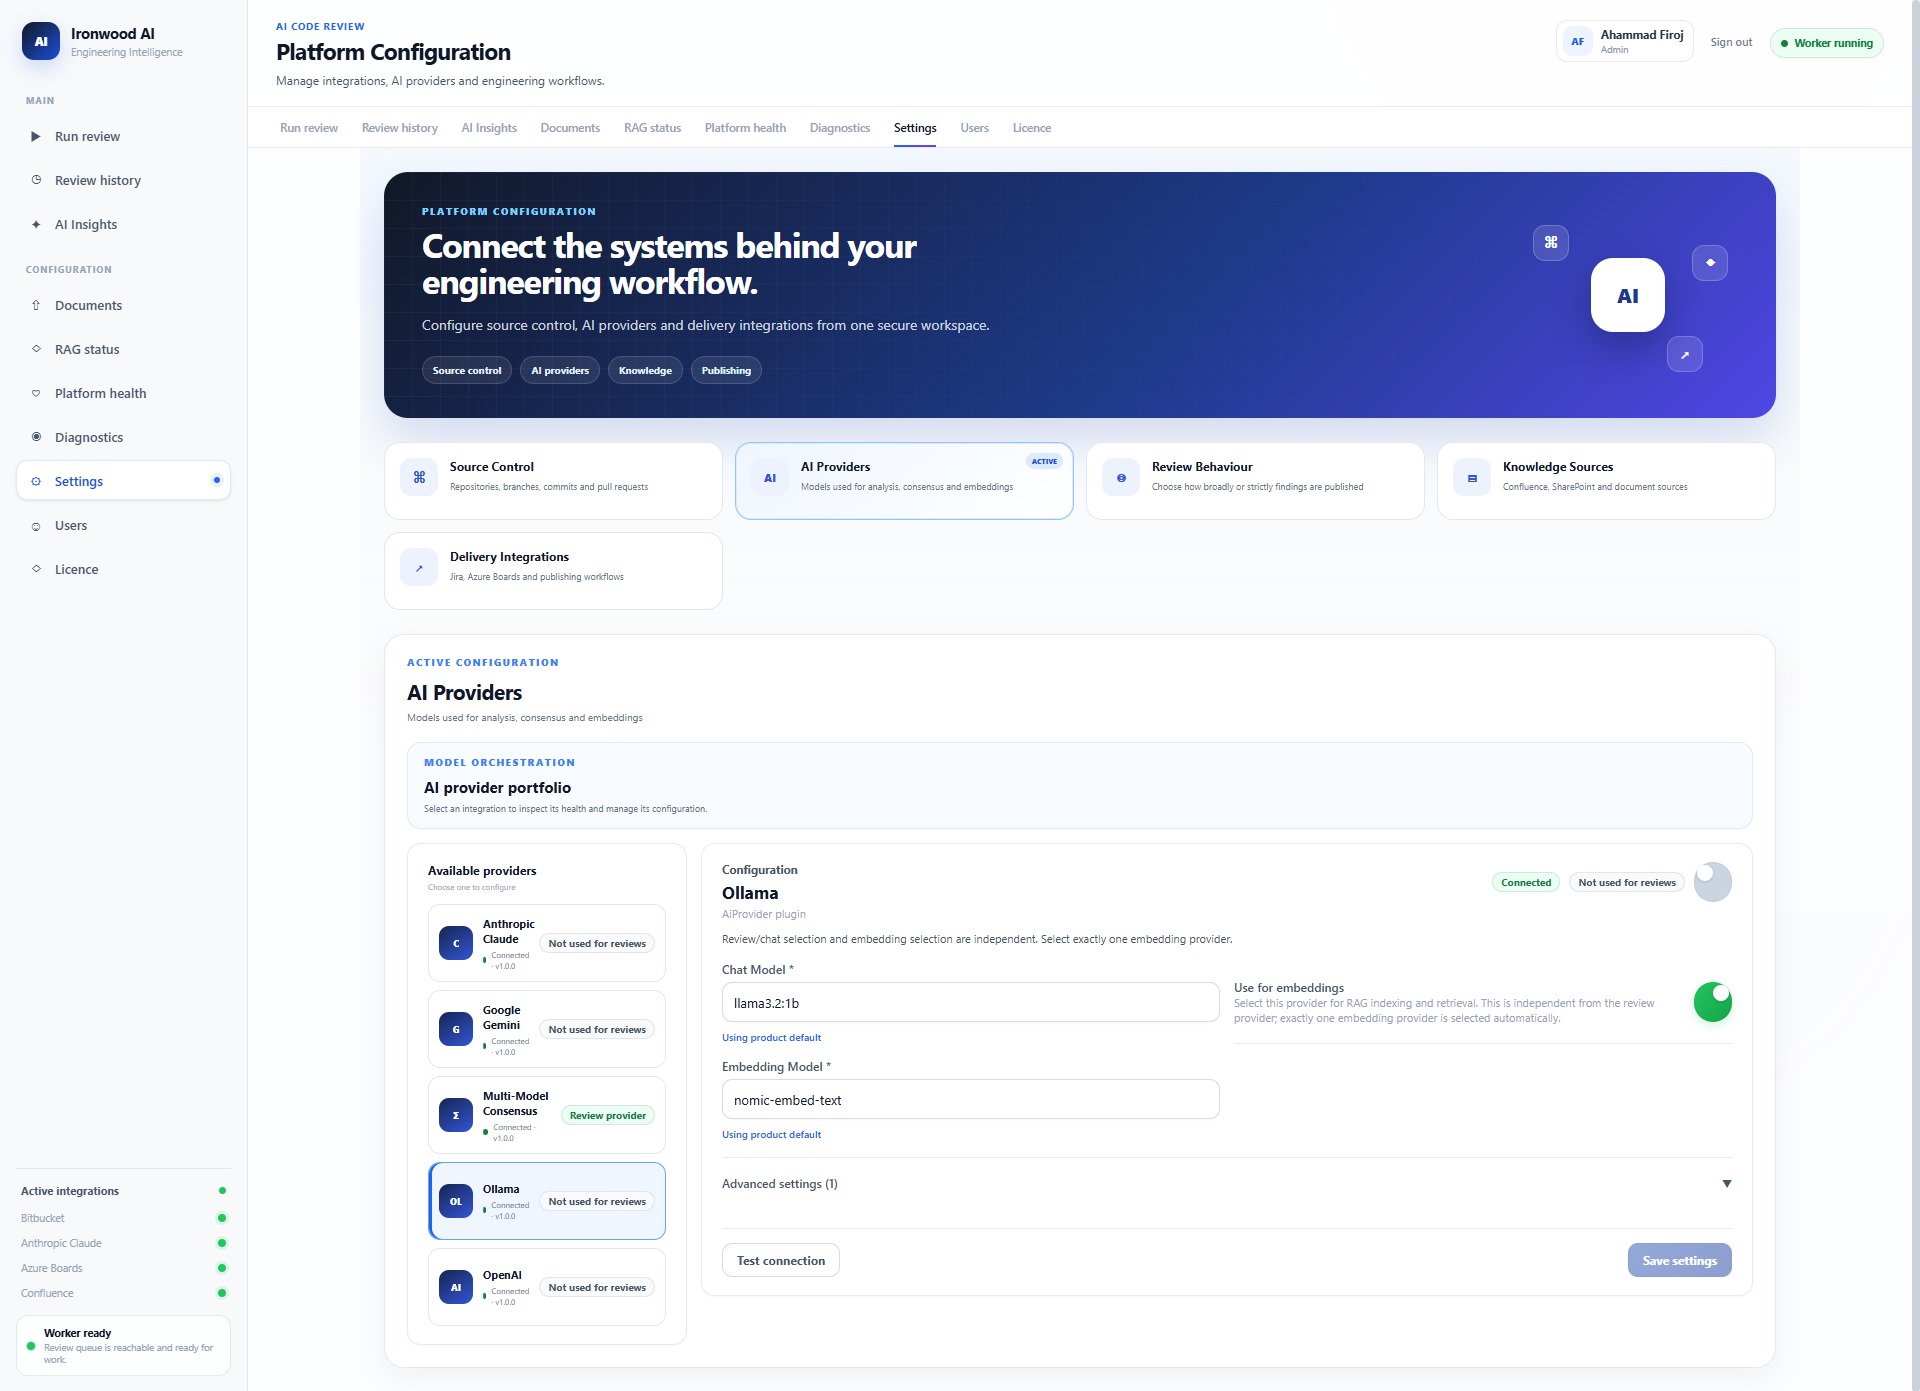
Open Settings → AI Providers. Configure and test the providers you want Ironwood to use. You can review with one provider or configure several and use Multi-Model Consensus to compare their findings.
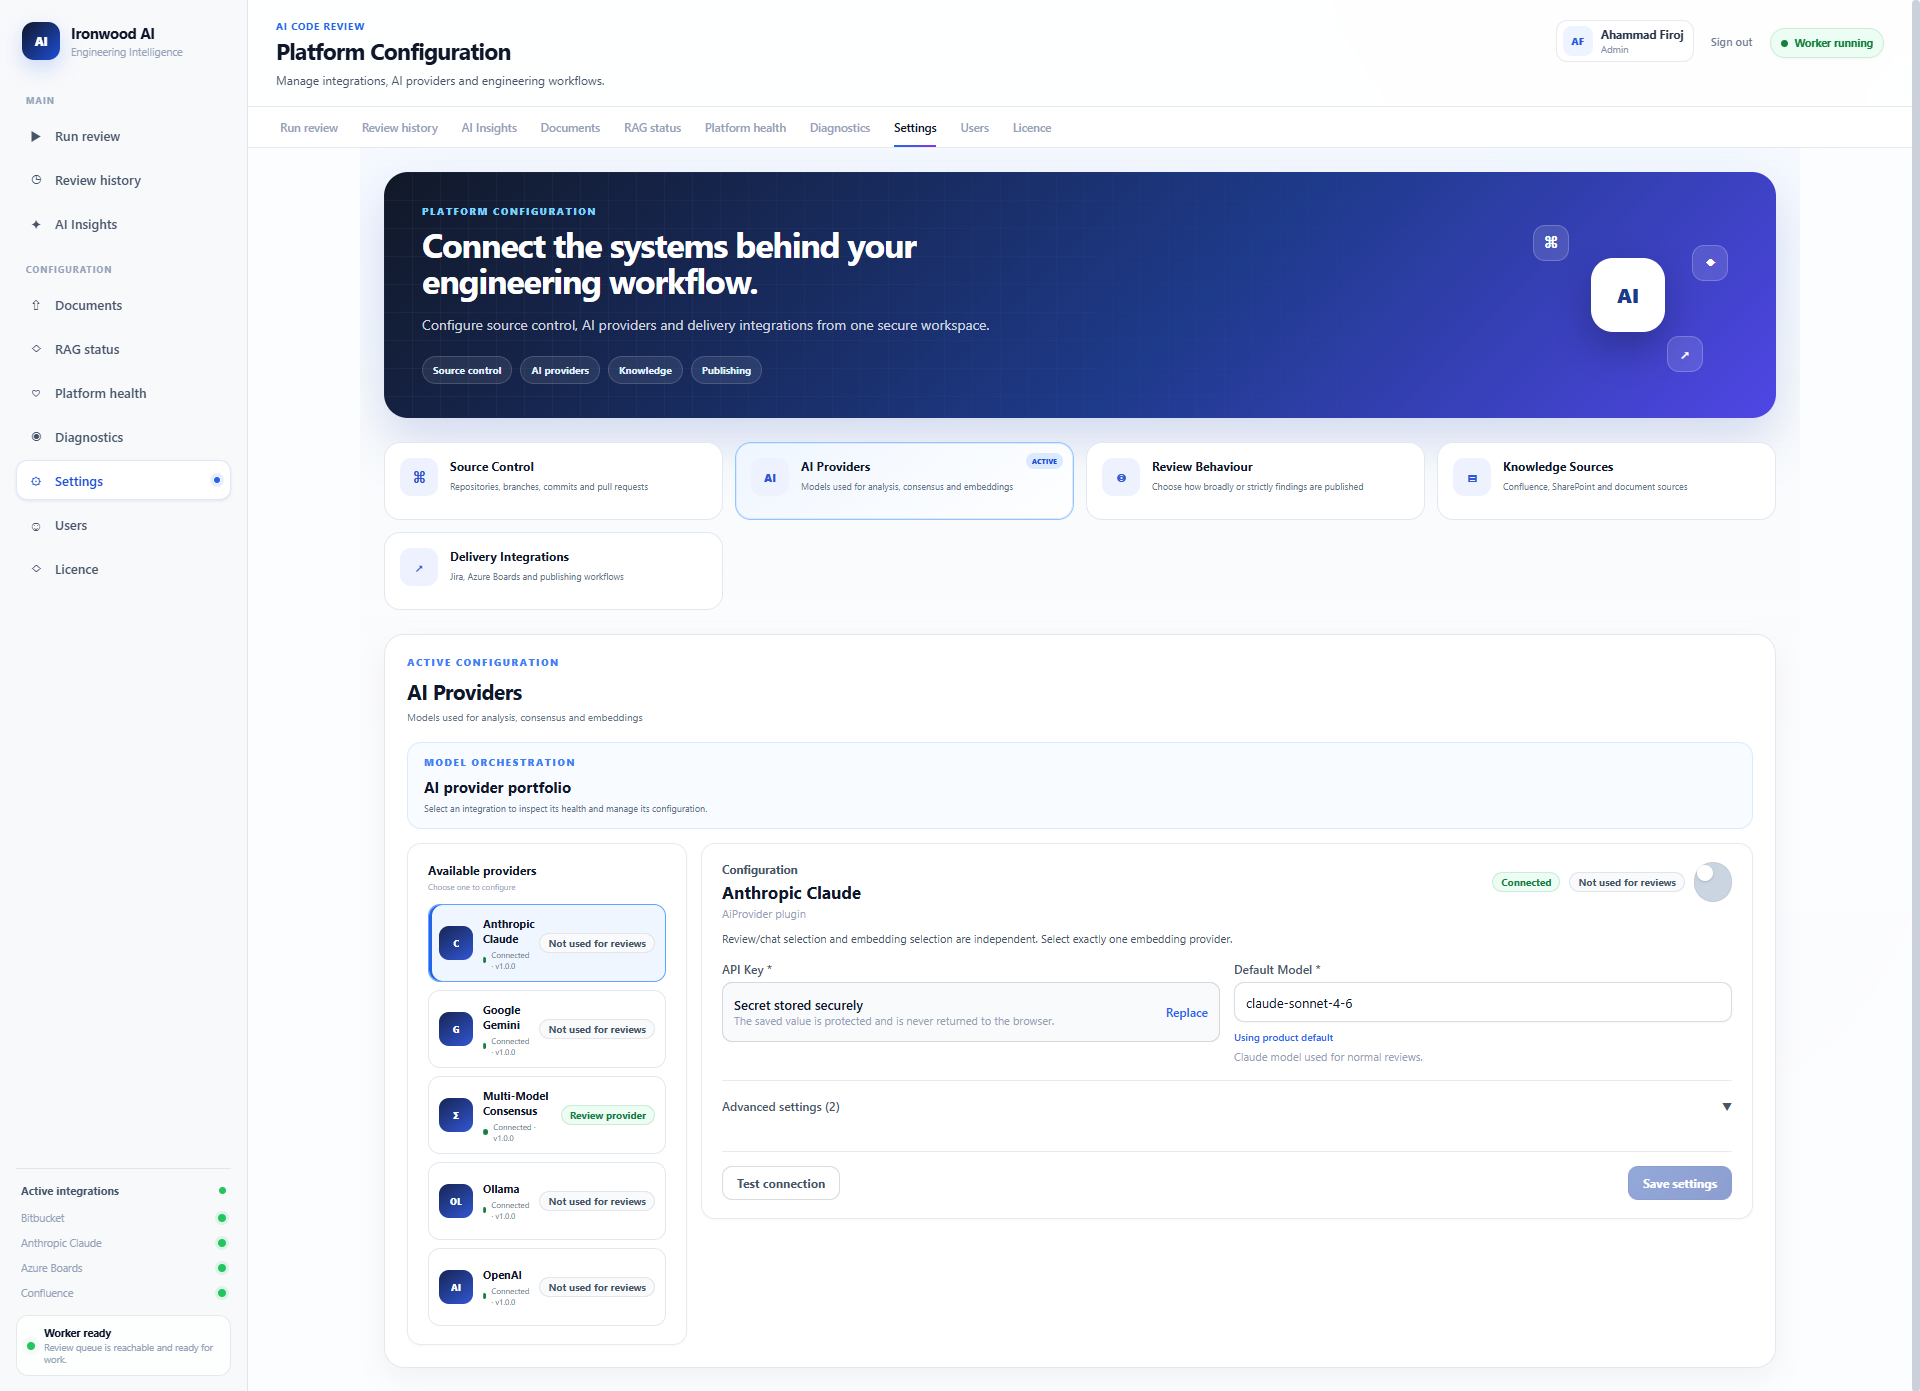
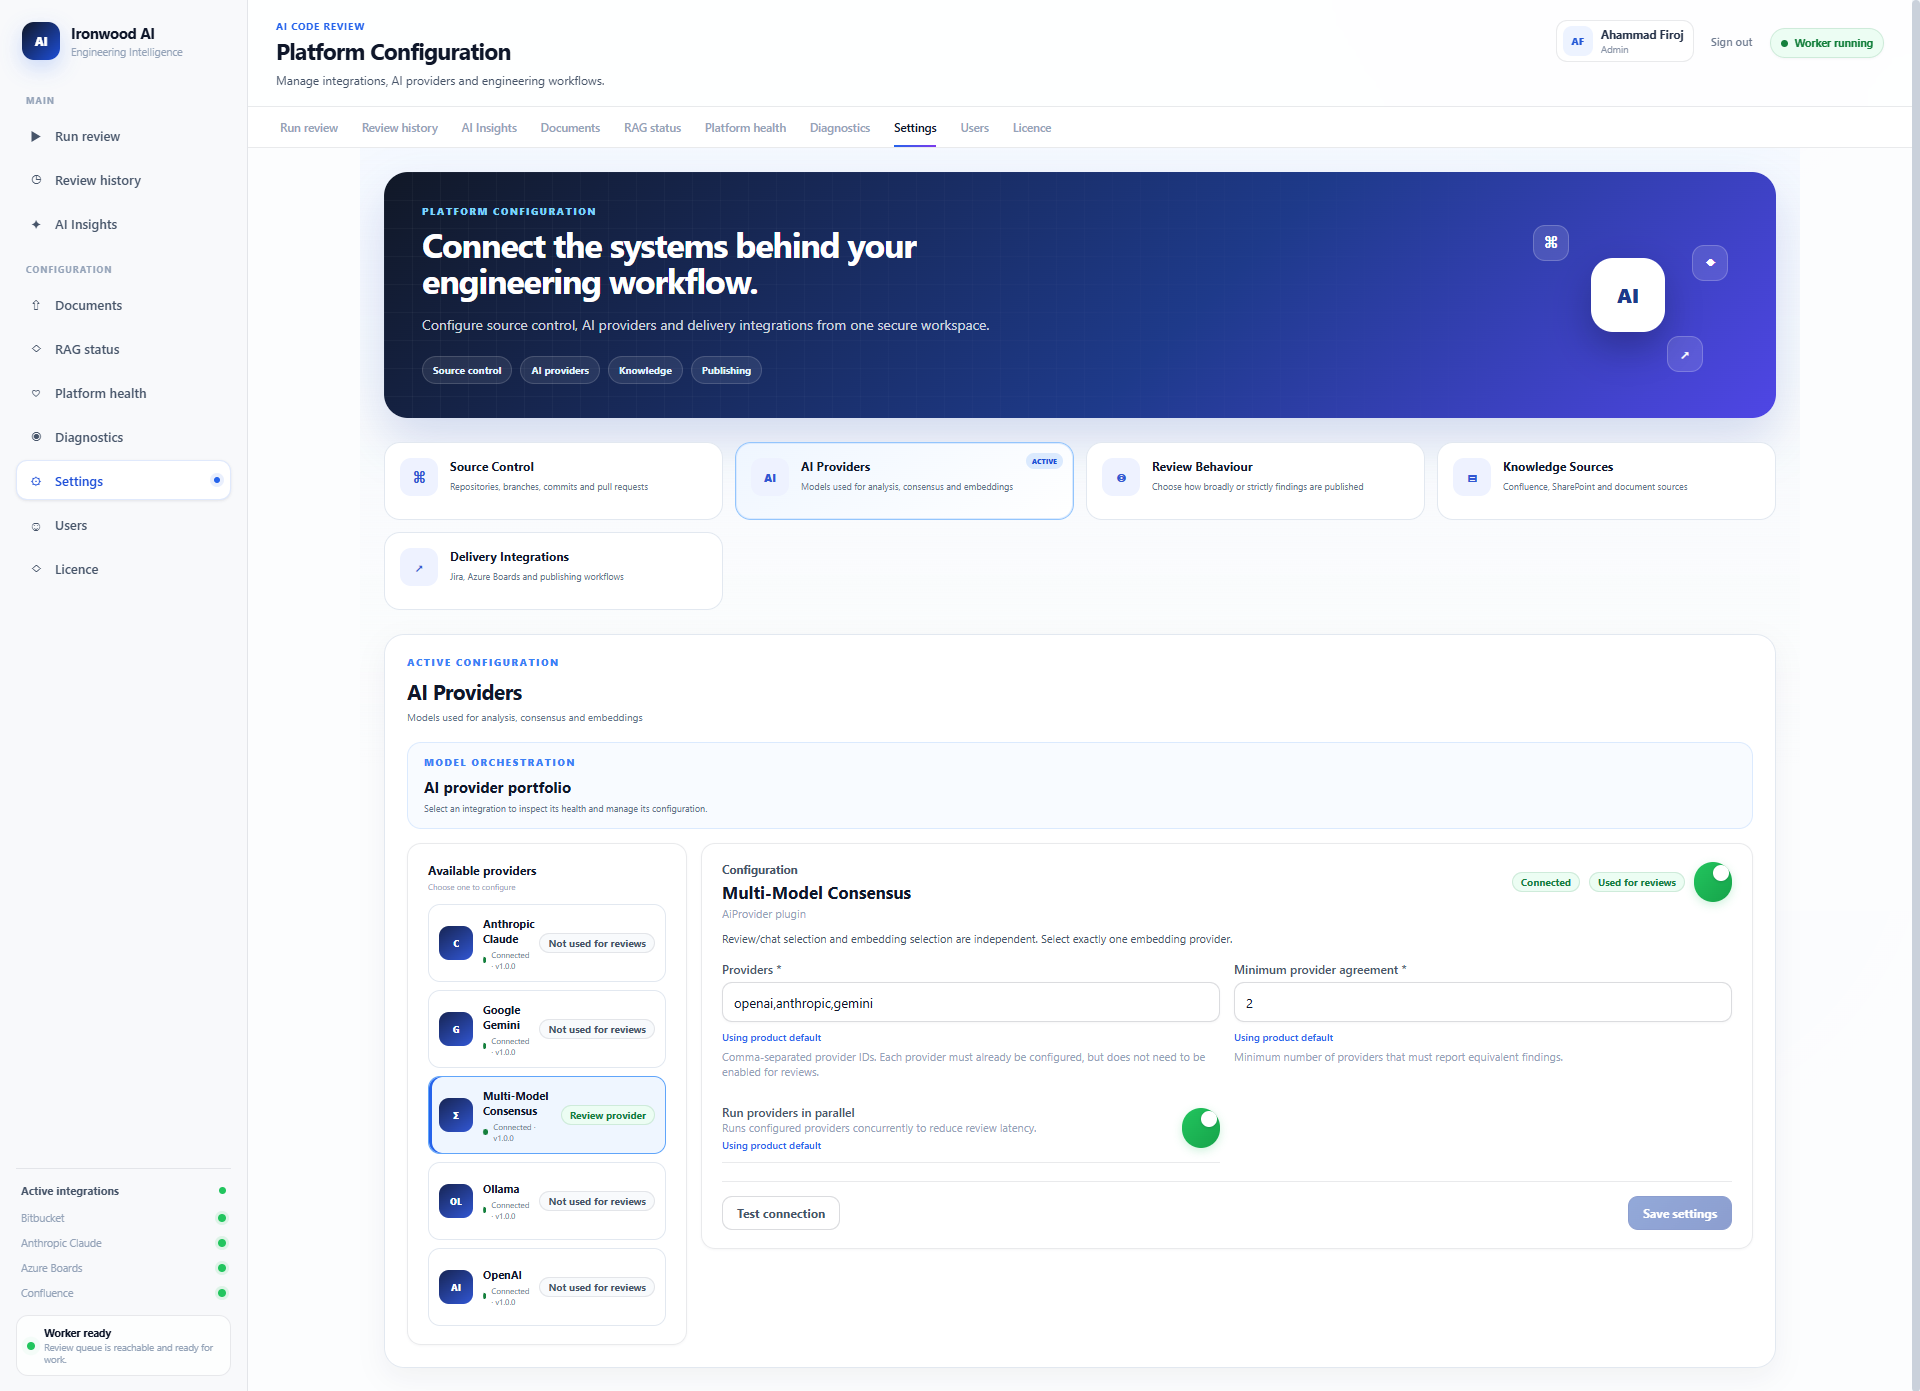
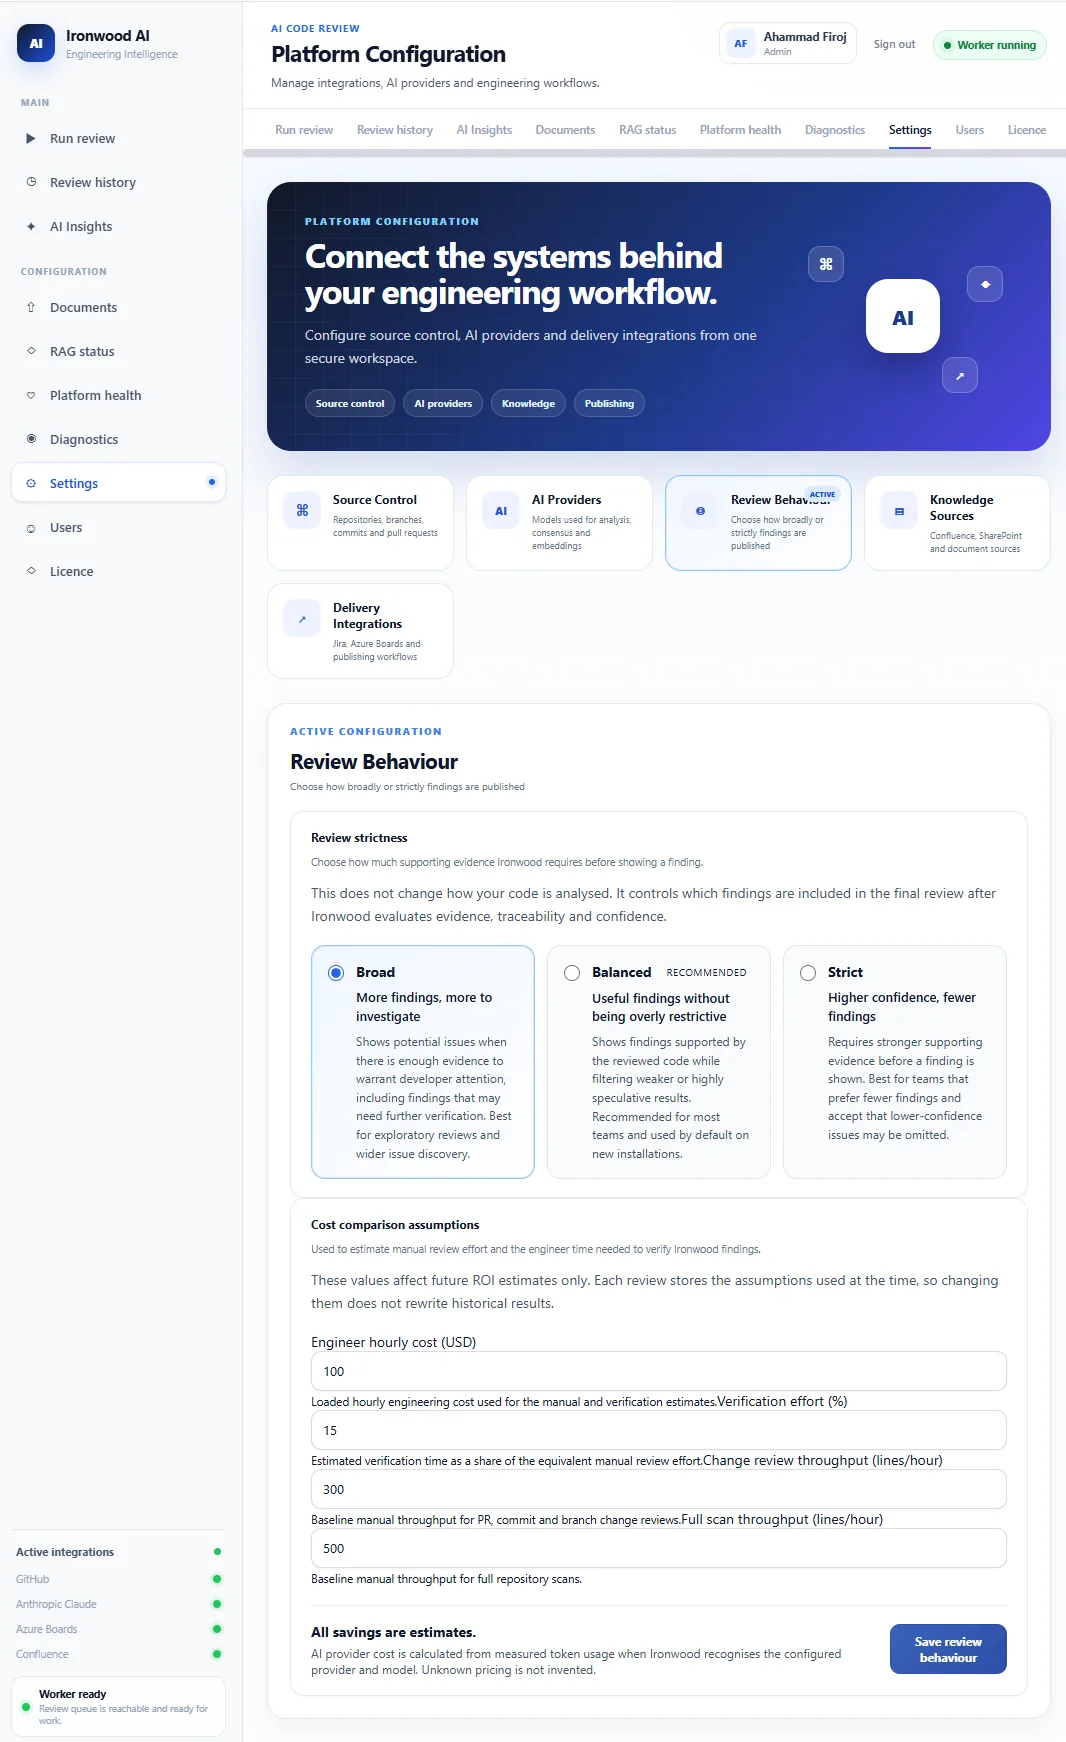
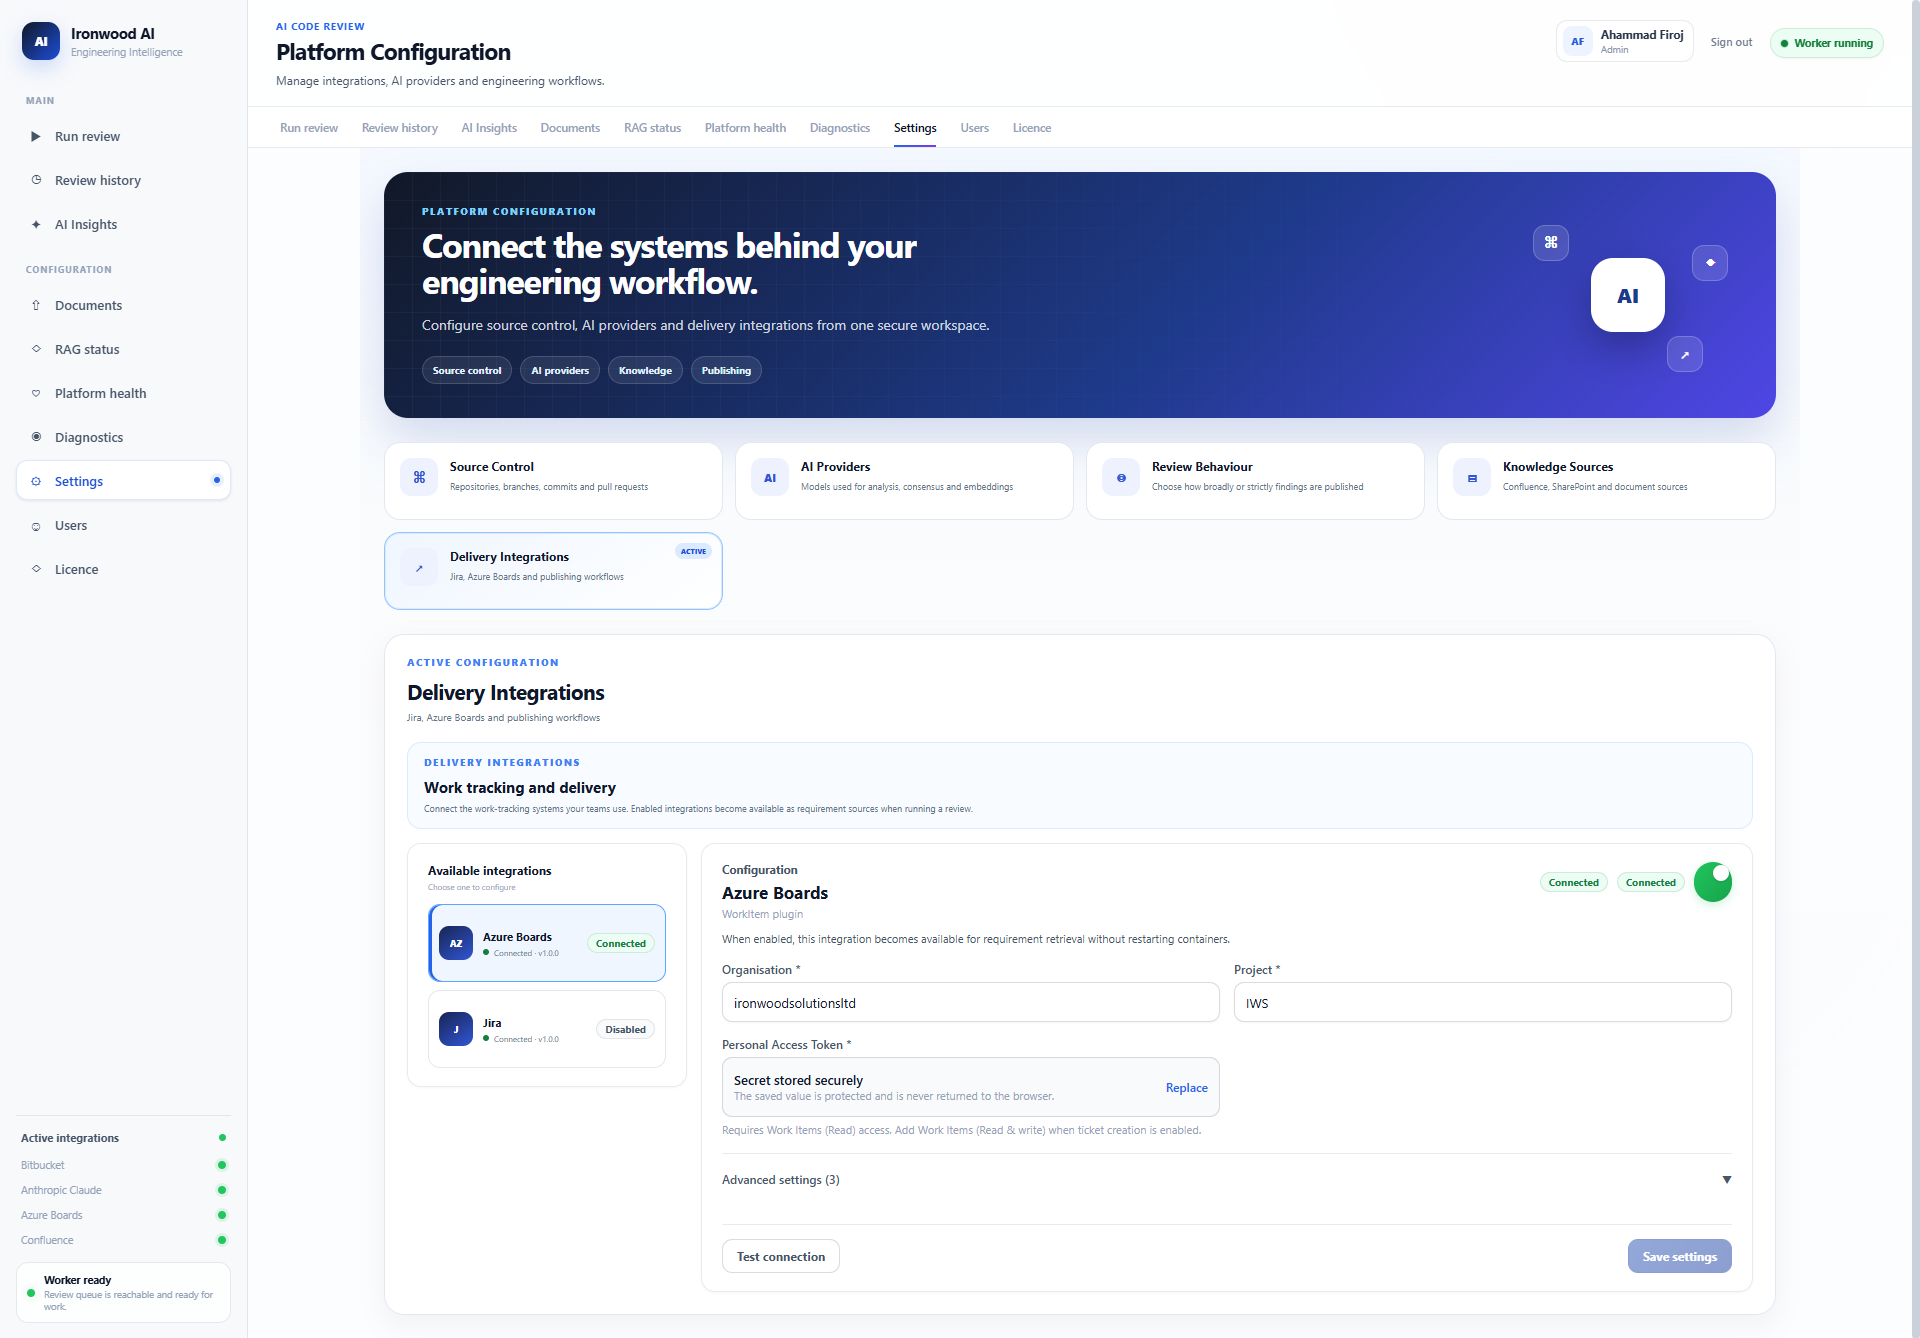
6. Set review behaviour and delivery integrations
Use Settings → Review Behaviour to choose how Ironwood publishes findings and to configure the engineering-cost assumptions used for estimated review time, savings and ROI. Configure Delivery Integrations if you want to create Jira or Azure Boards work items or publish review output to Confluence. You can skip delivery integrations for your first review.
7. Add your engineering knowledge
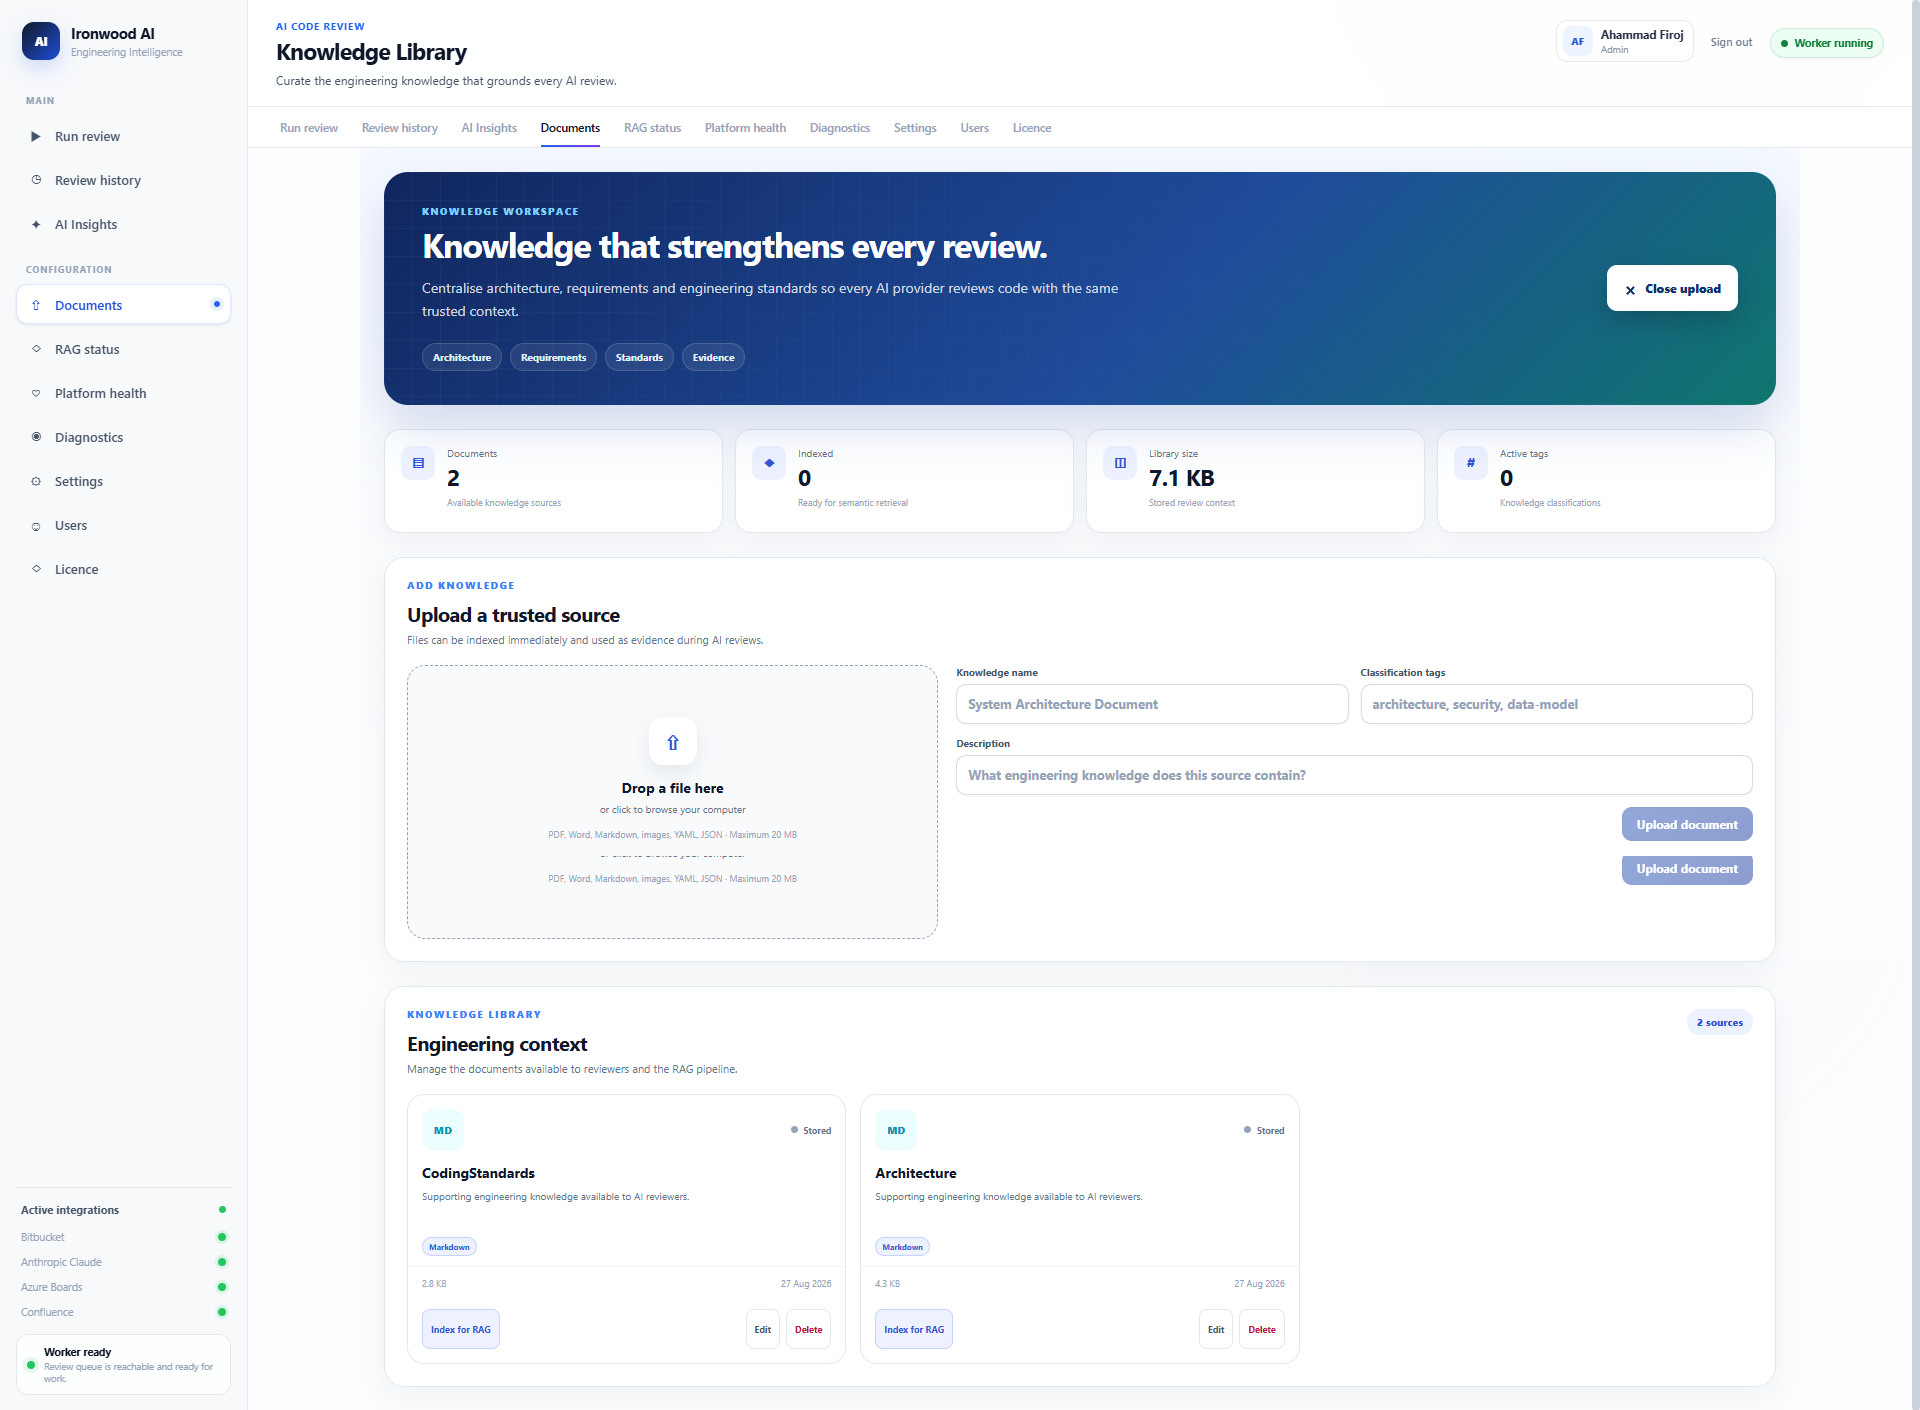
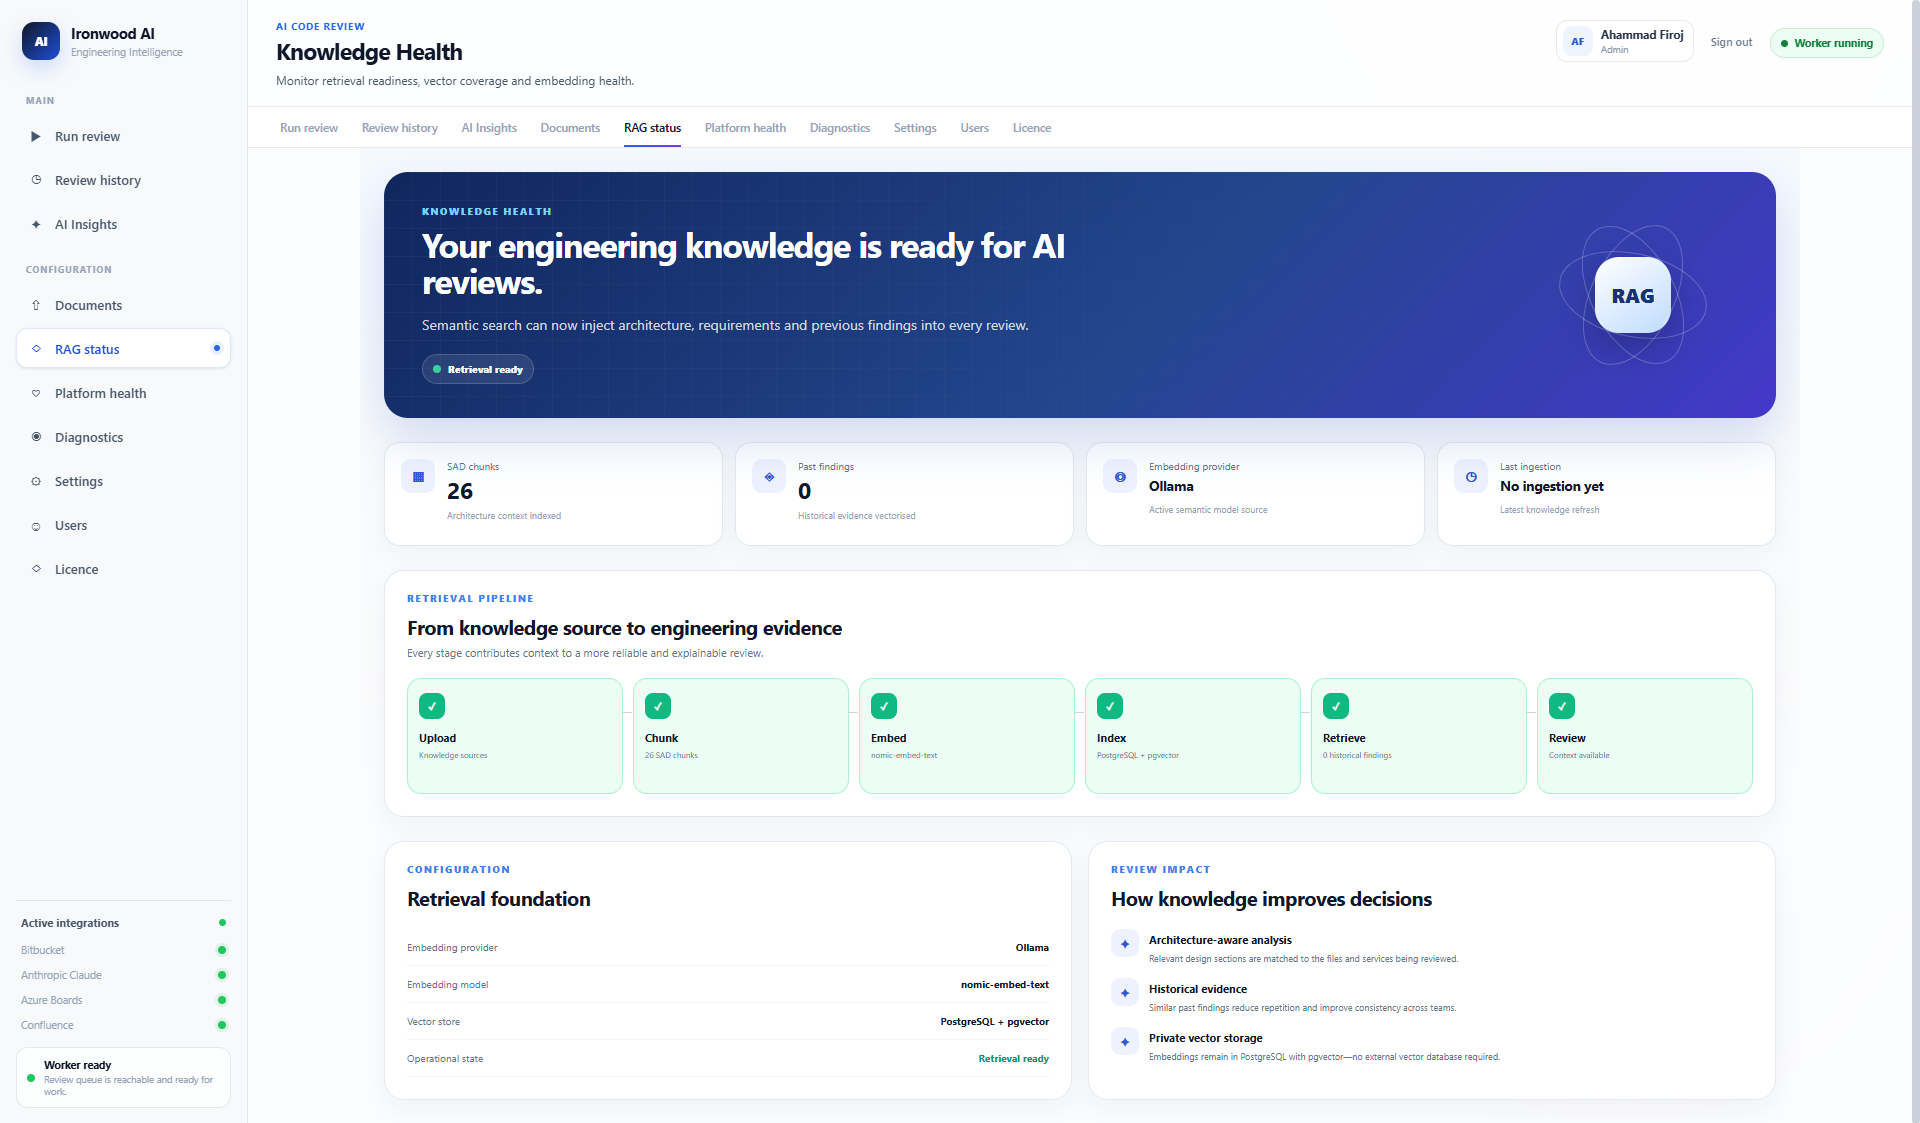
If you want Ironwood to use your team's standards, architecture guidance or other supporting documents, configure an embeddings provider and add the documents under Engineering Knowledge. Check that the content is indexed before using it in a review.
8. Check Platform Health
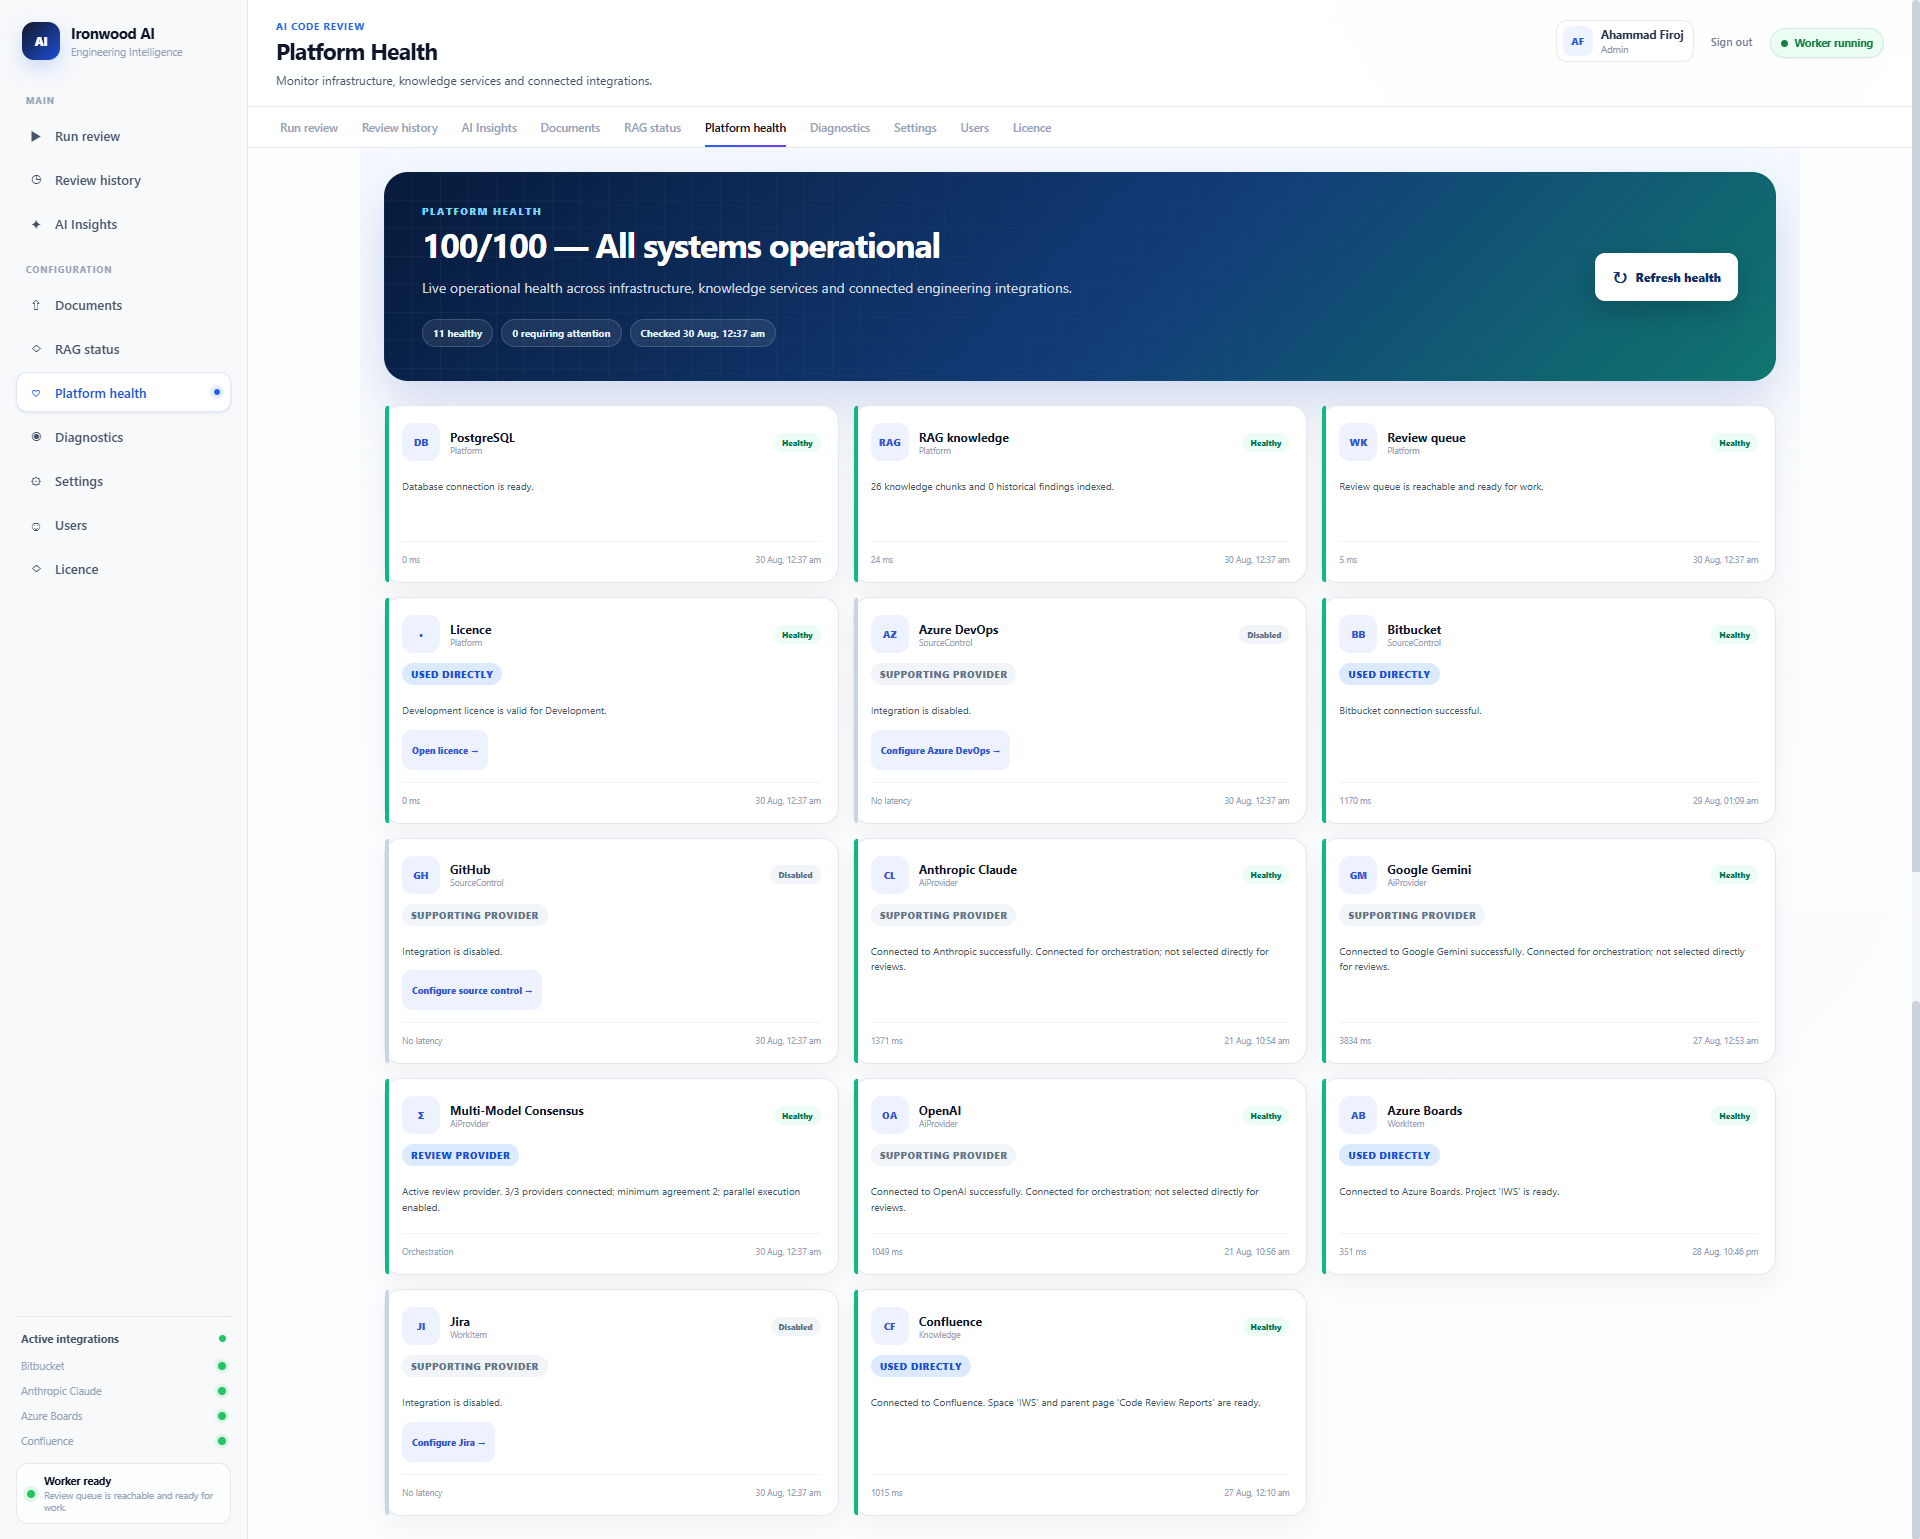
Before the first review, open Platform Health. Check that the services and integrations your review depends on are healthy. Fix anything that is not ready before continuing.
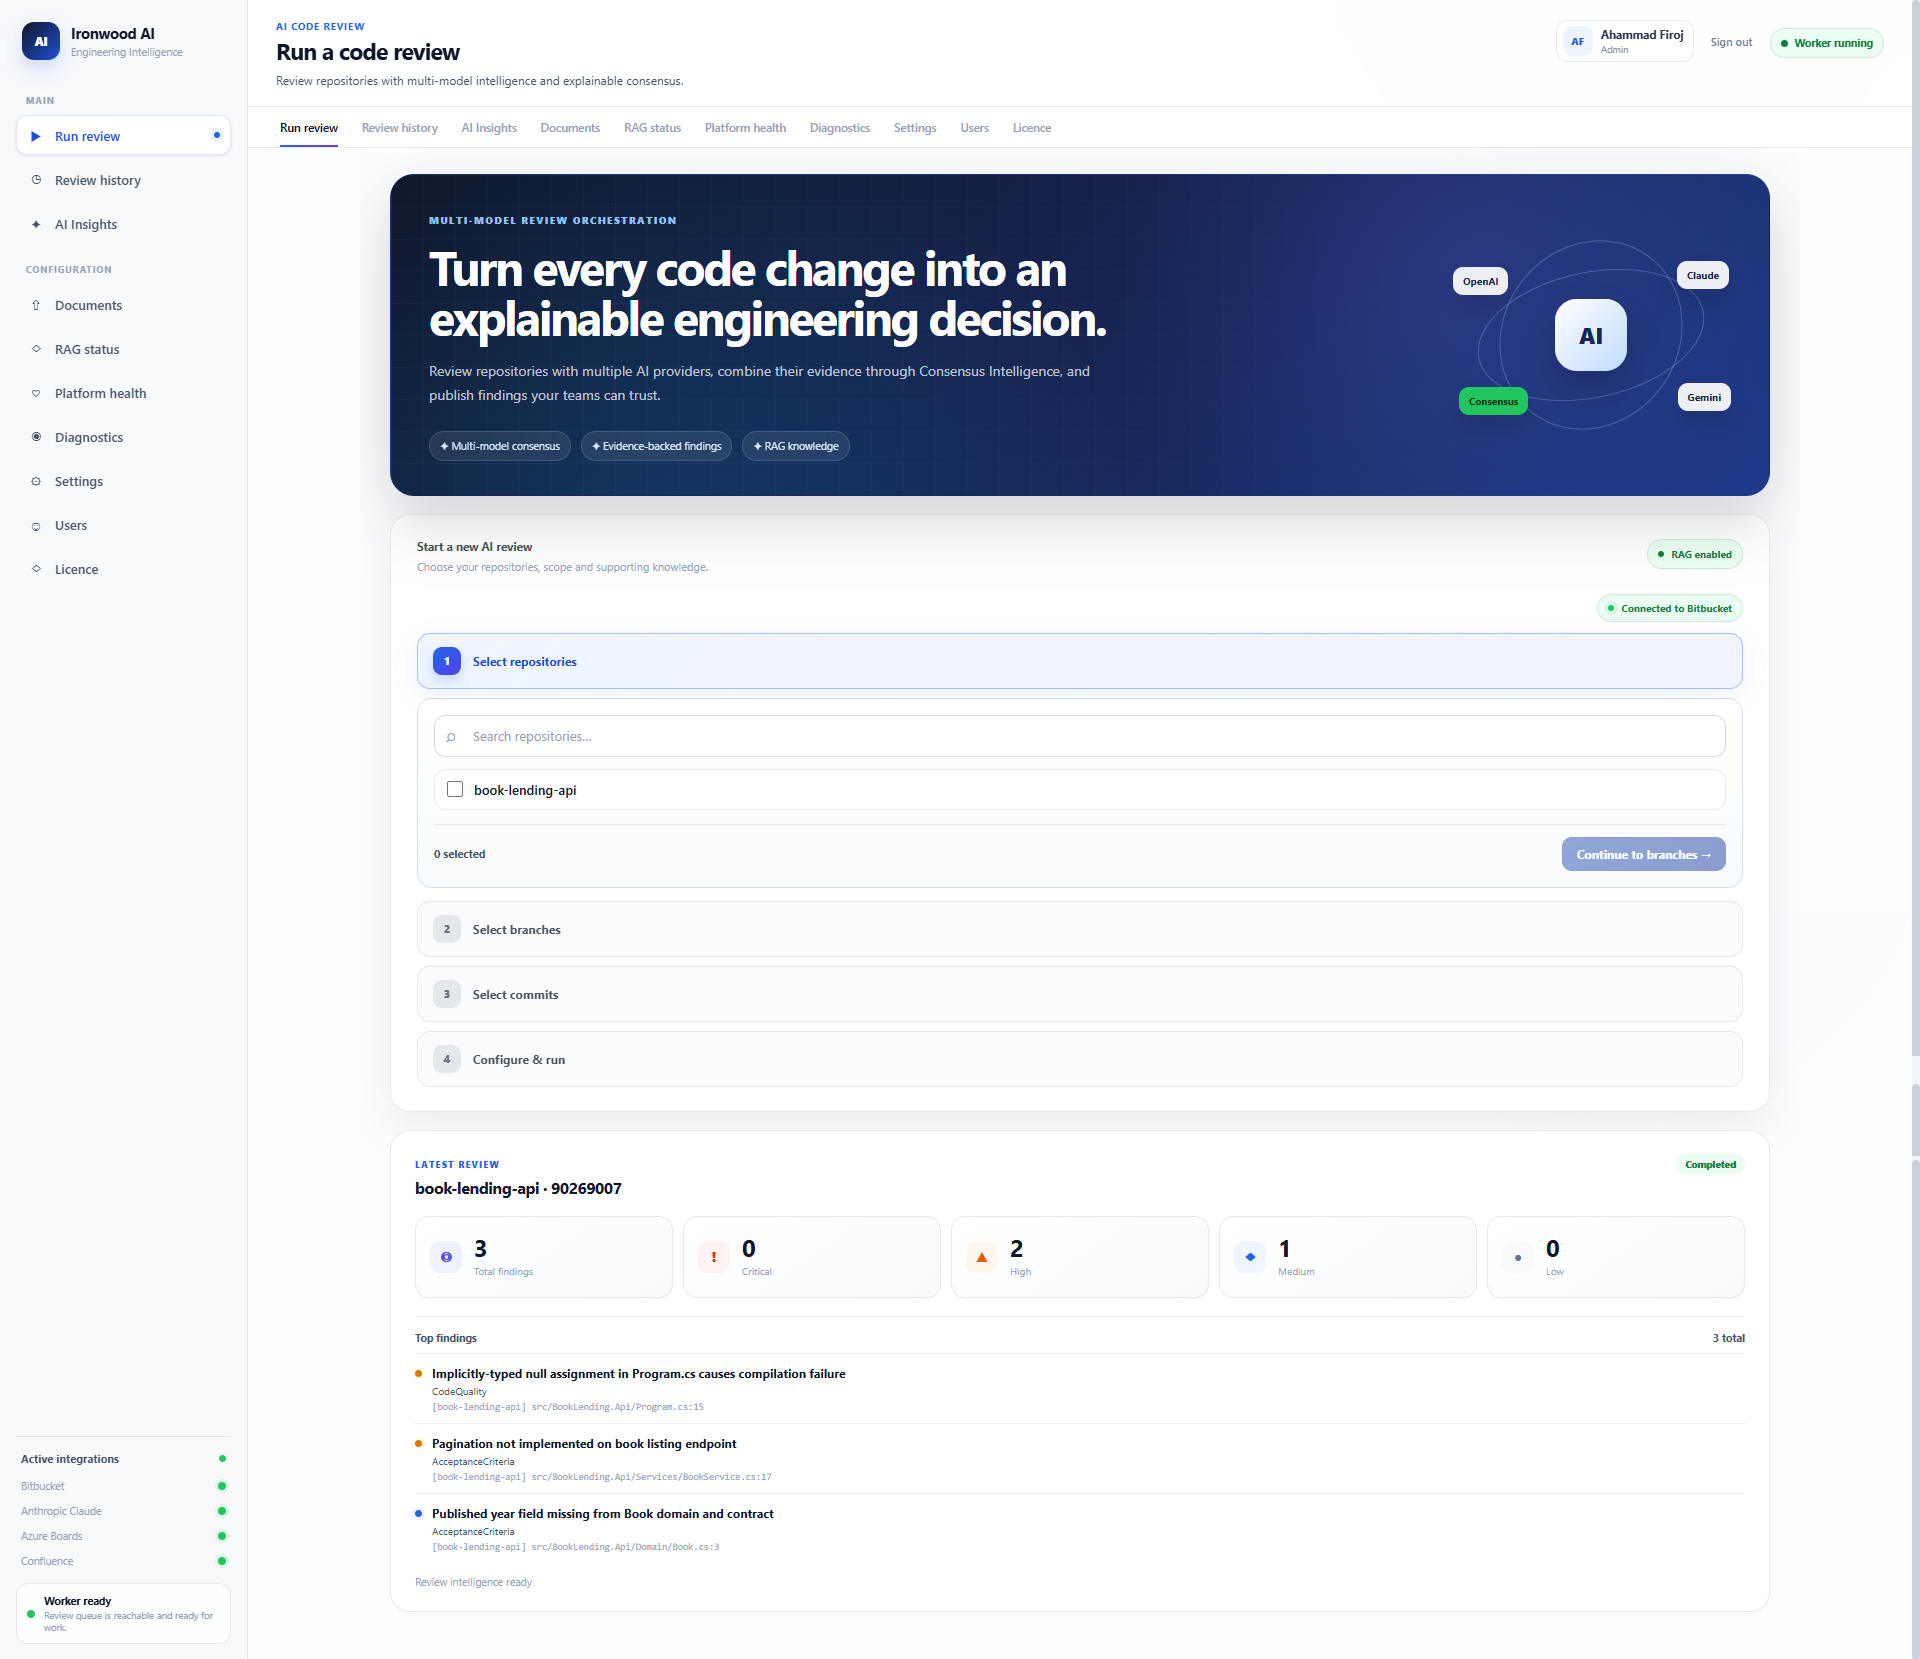
9. Select the repository
Open Run Review and choose a repository from the active source-control integration.
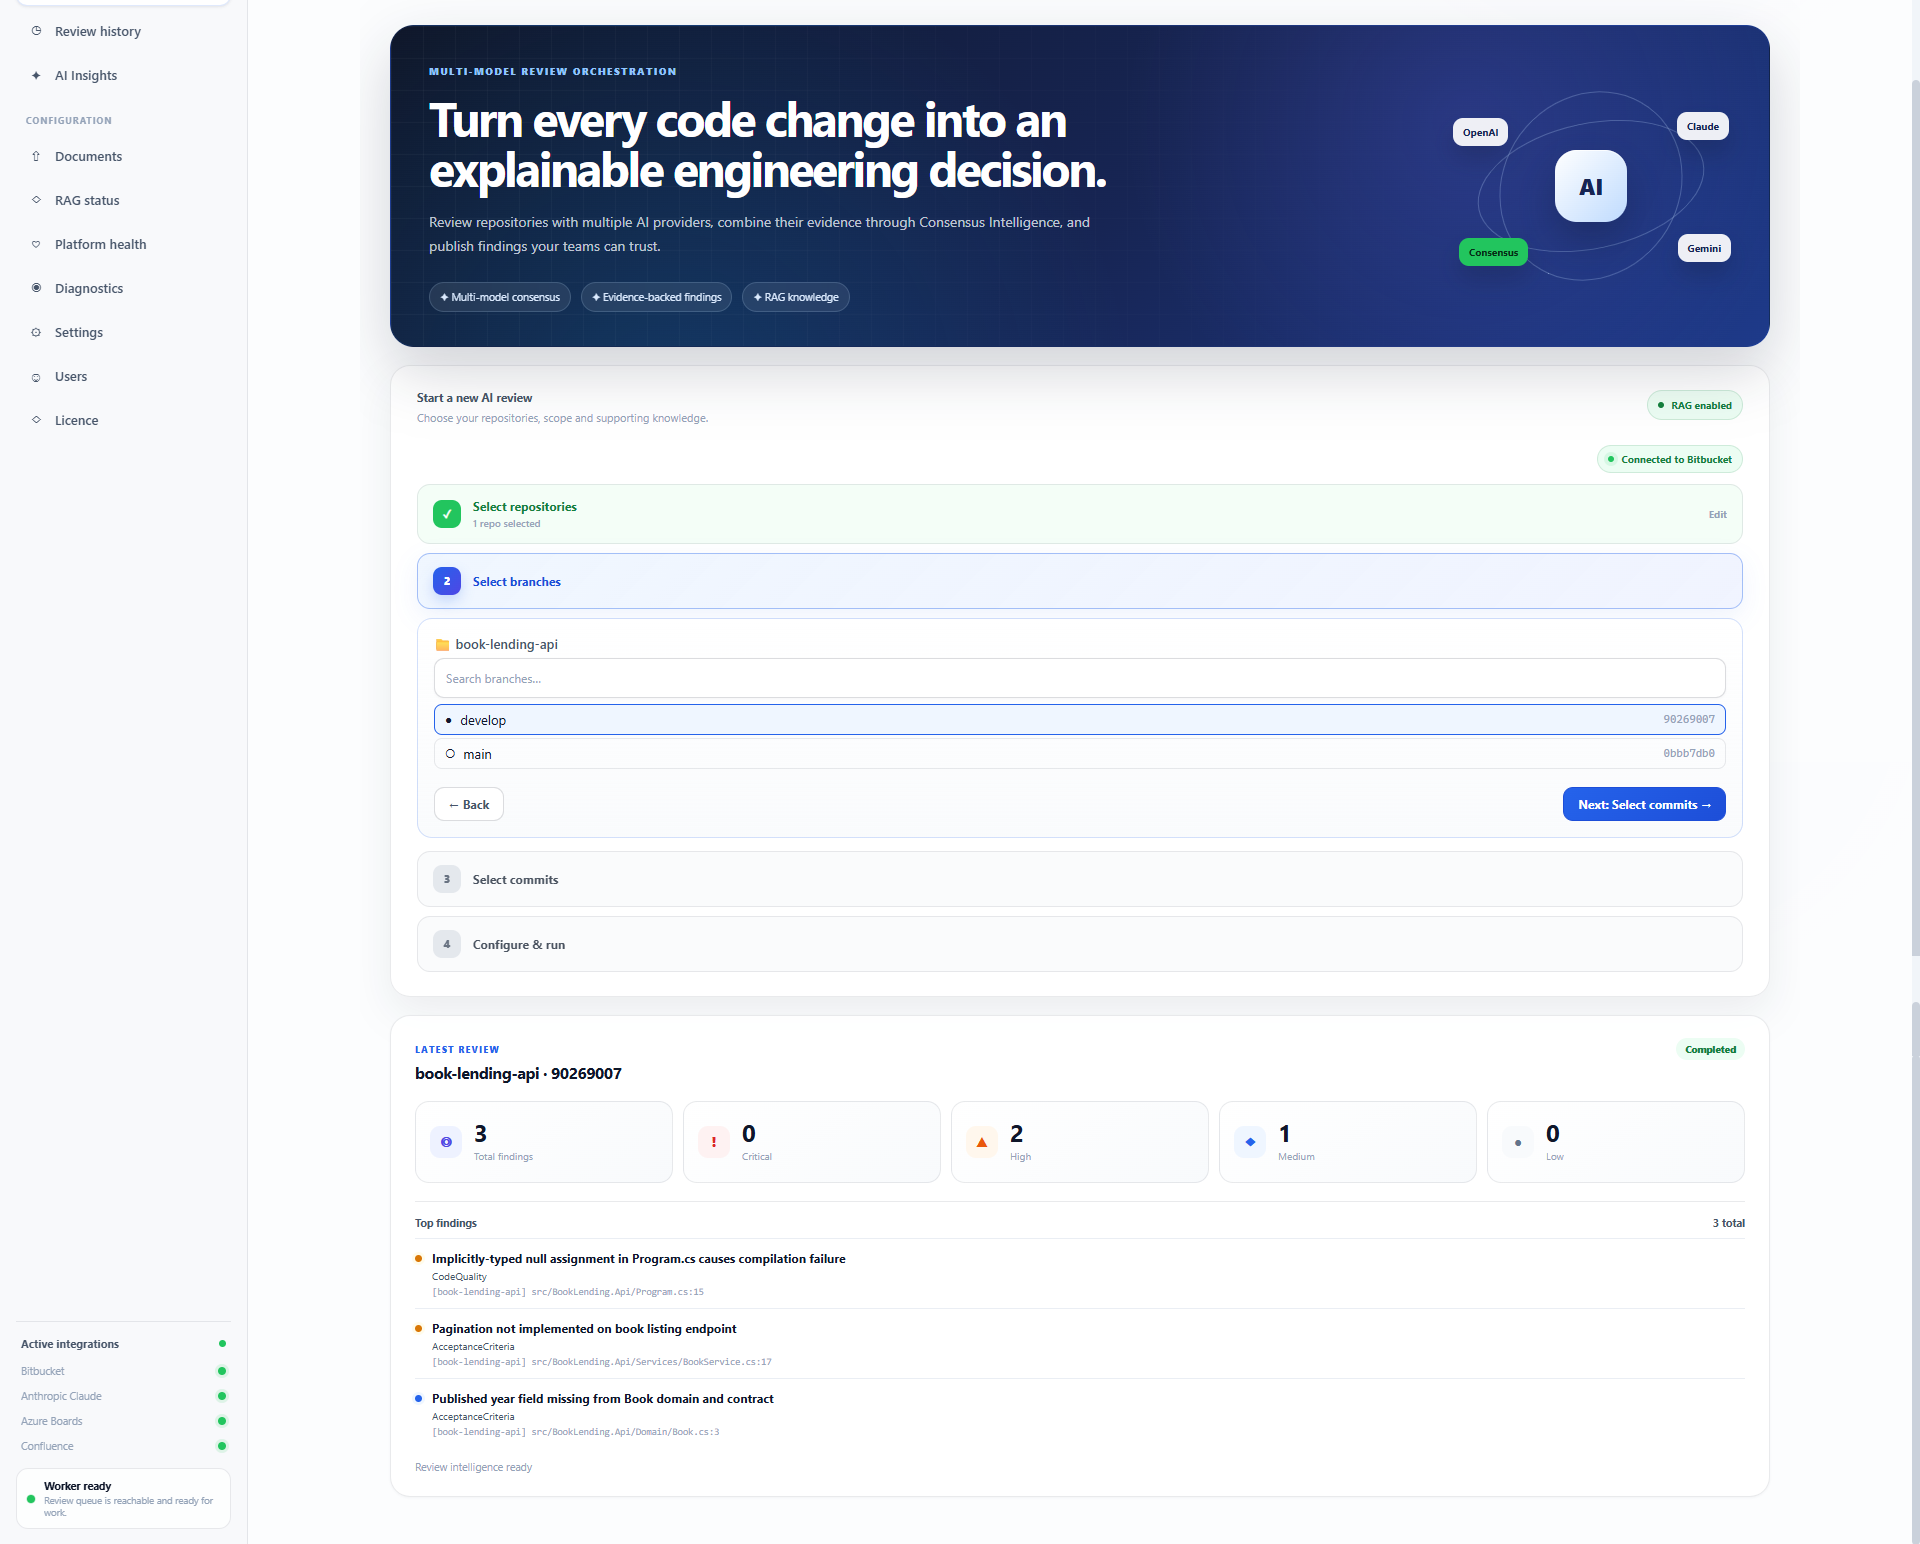
10. Select the branch
Choose the branch that contains the change you want to review.
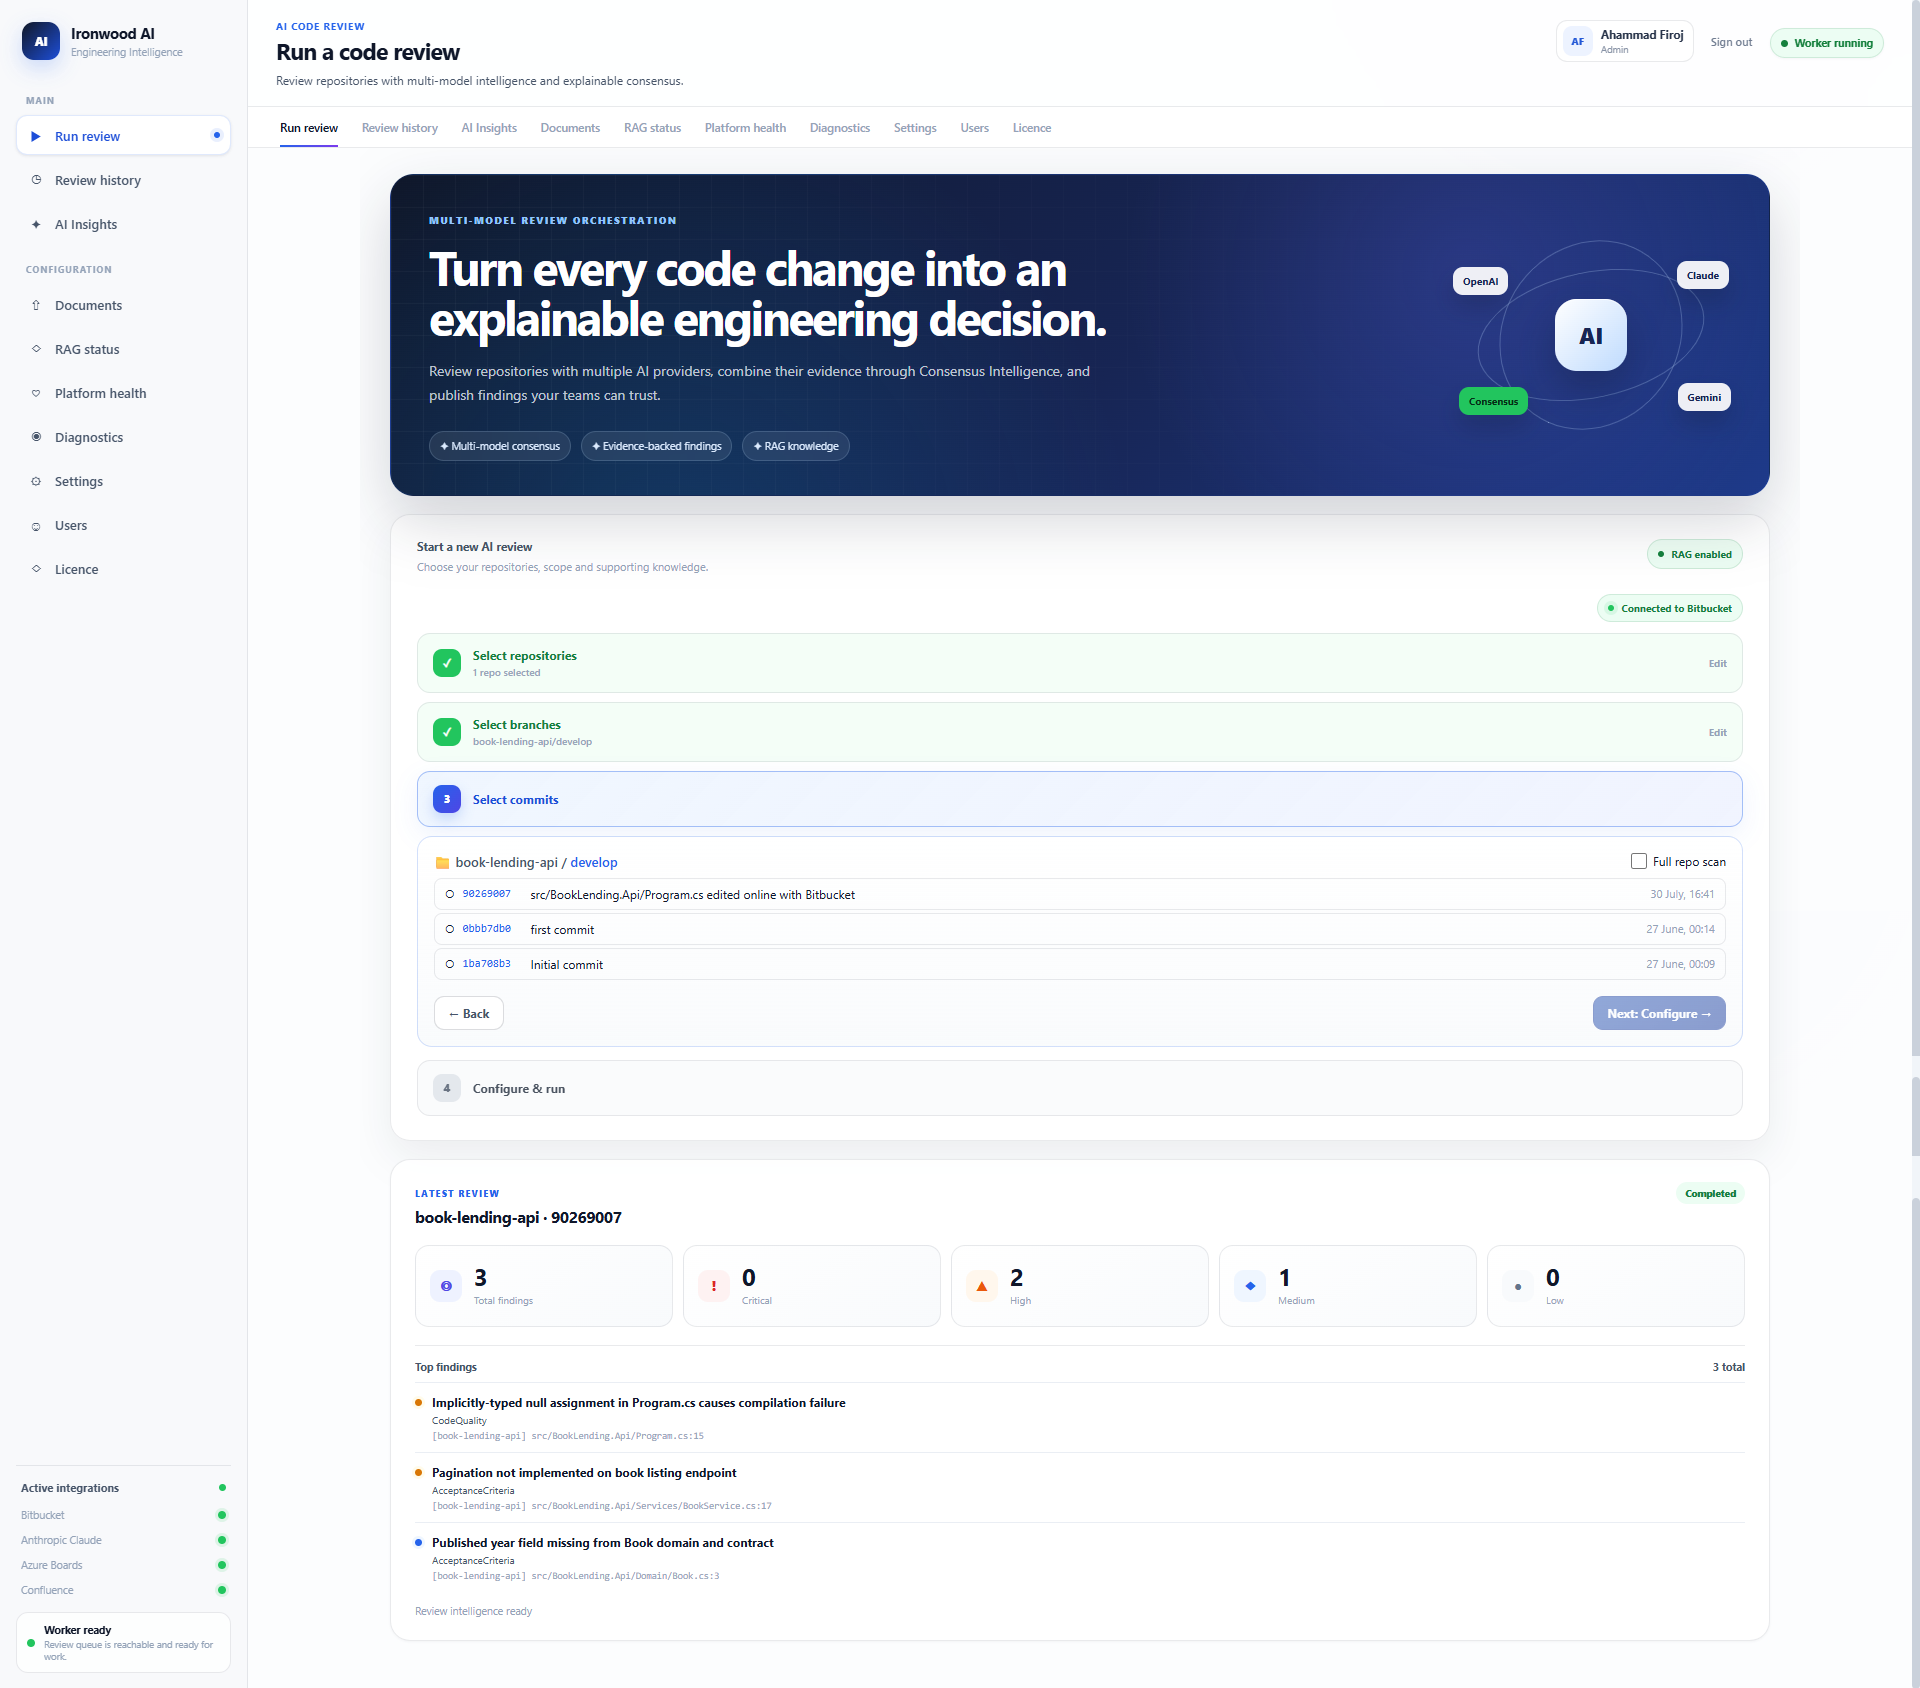
11. Select a commit or run a full repository scan
Select the commit you want reviewed, or choose Full repo scan when you want Ironwood to inspect the repository more broadly.
12. Add requirement context
Select the requirement source and the requirements that apply to this review. Ironwood adds that context to its engineering checks rather than treating the requirement as the entire review standard.
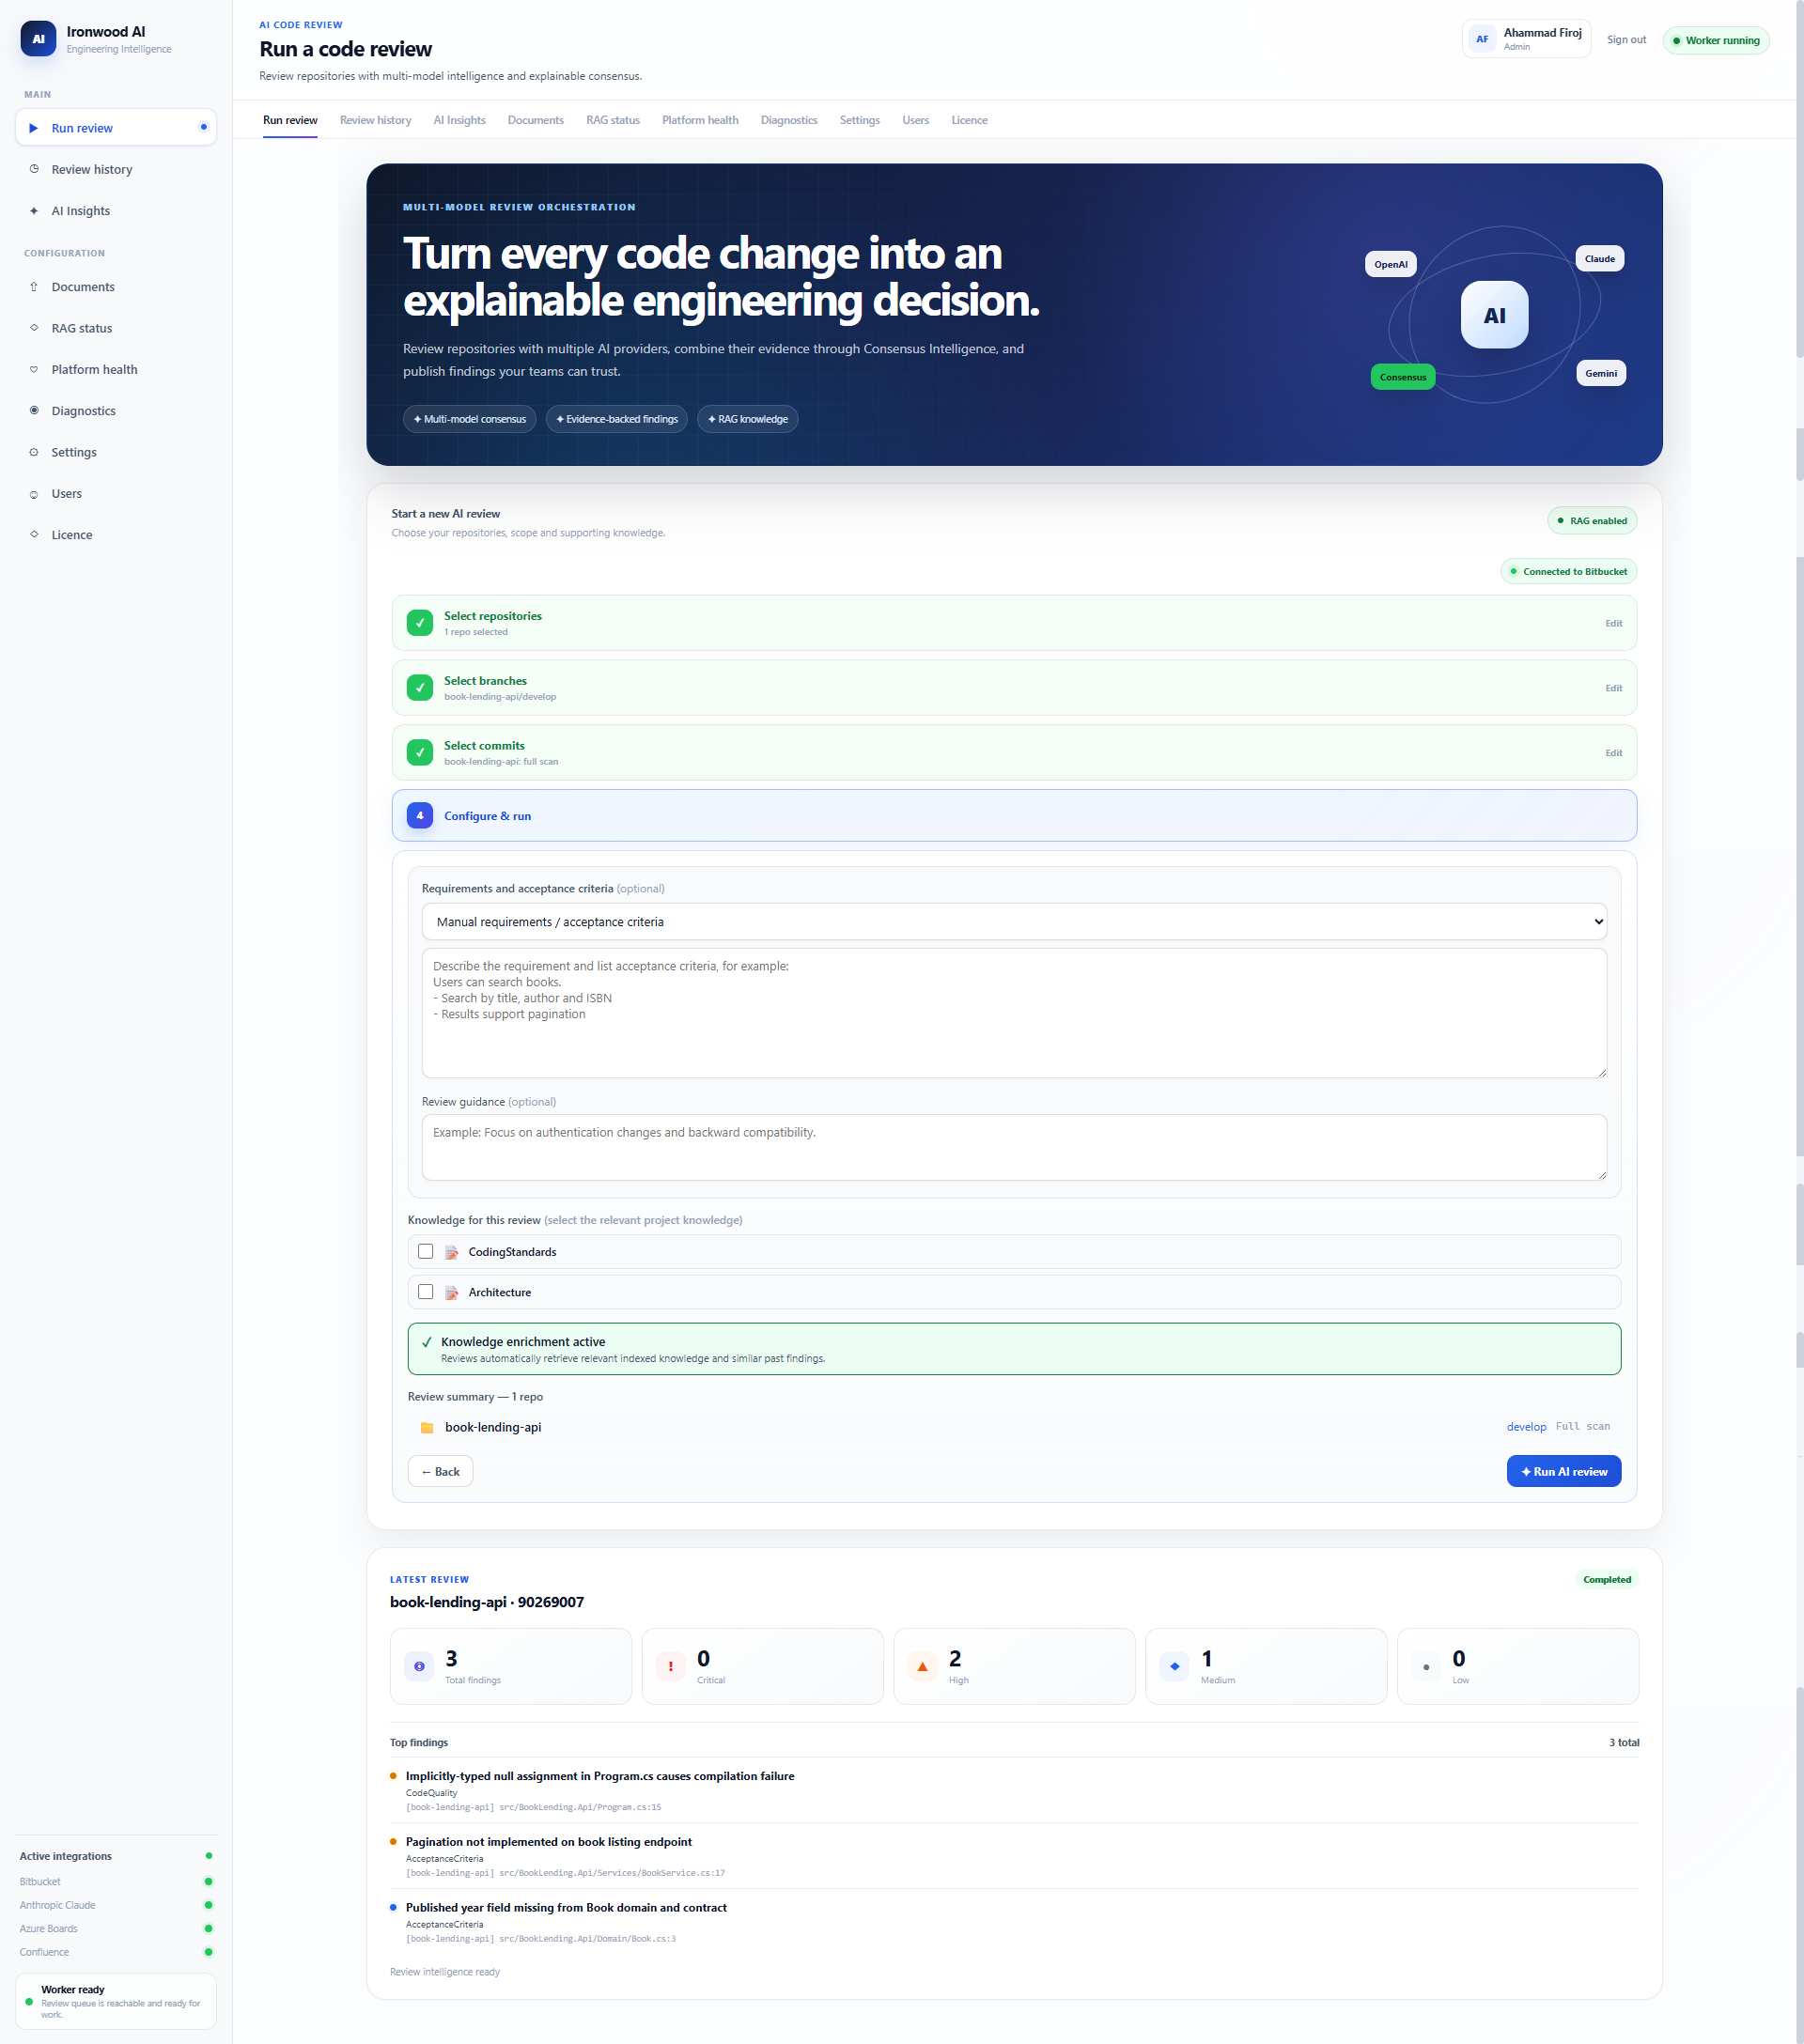
13. Select supporting engineering knowledge
If you have indexed engineering knowledge, select the documents relevant to this review. Ironwood retrieves this material to bring your team's own standards and architecture context into the review.
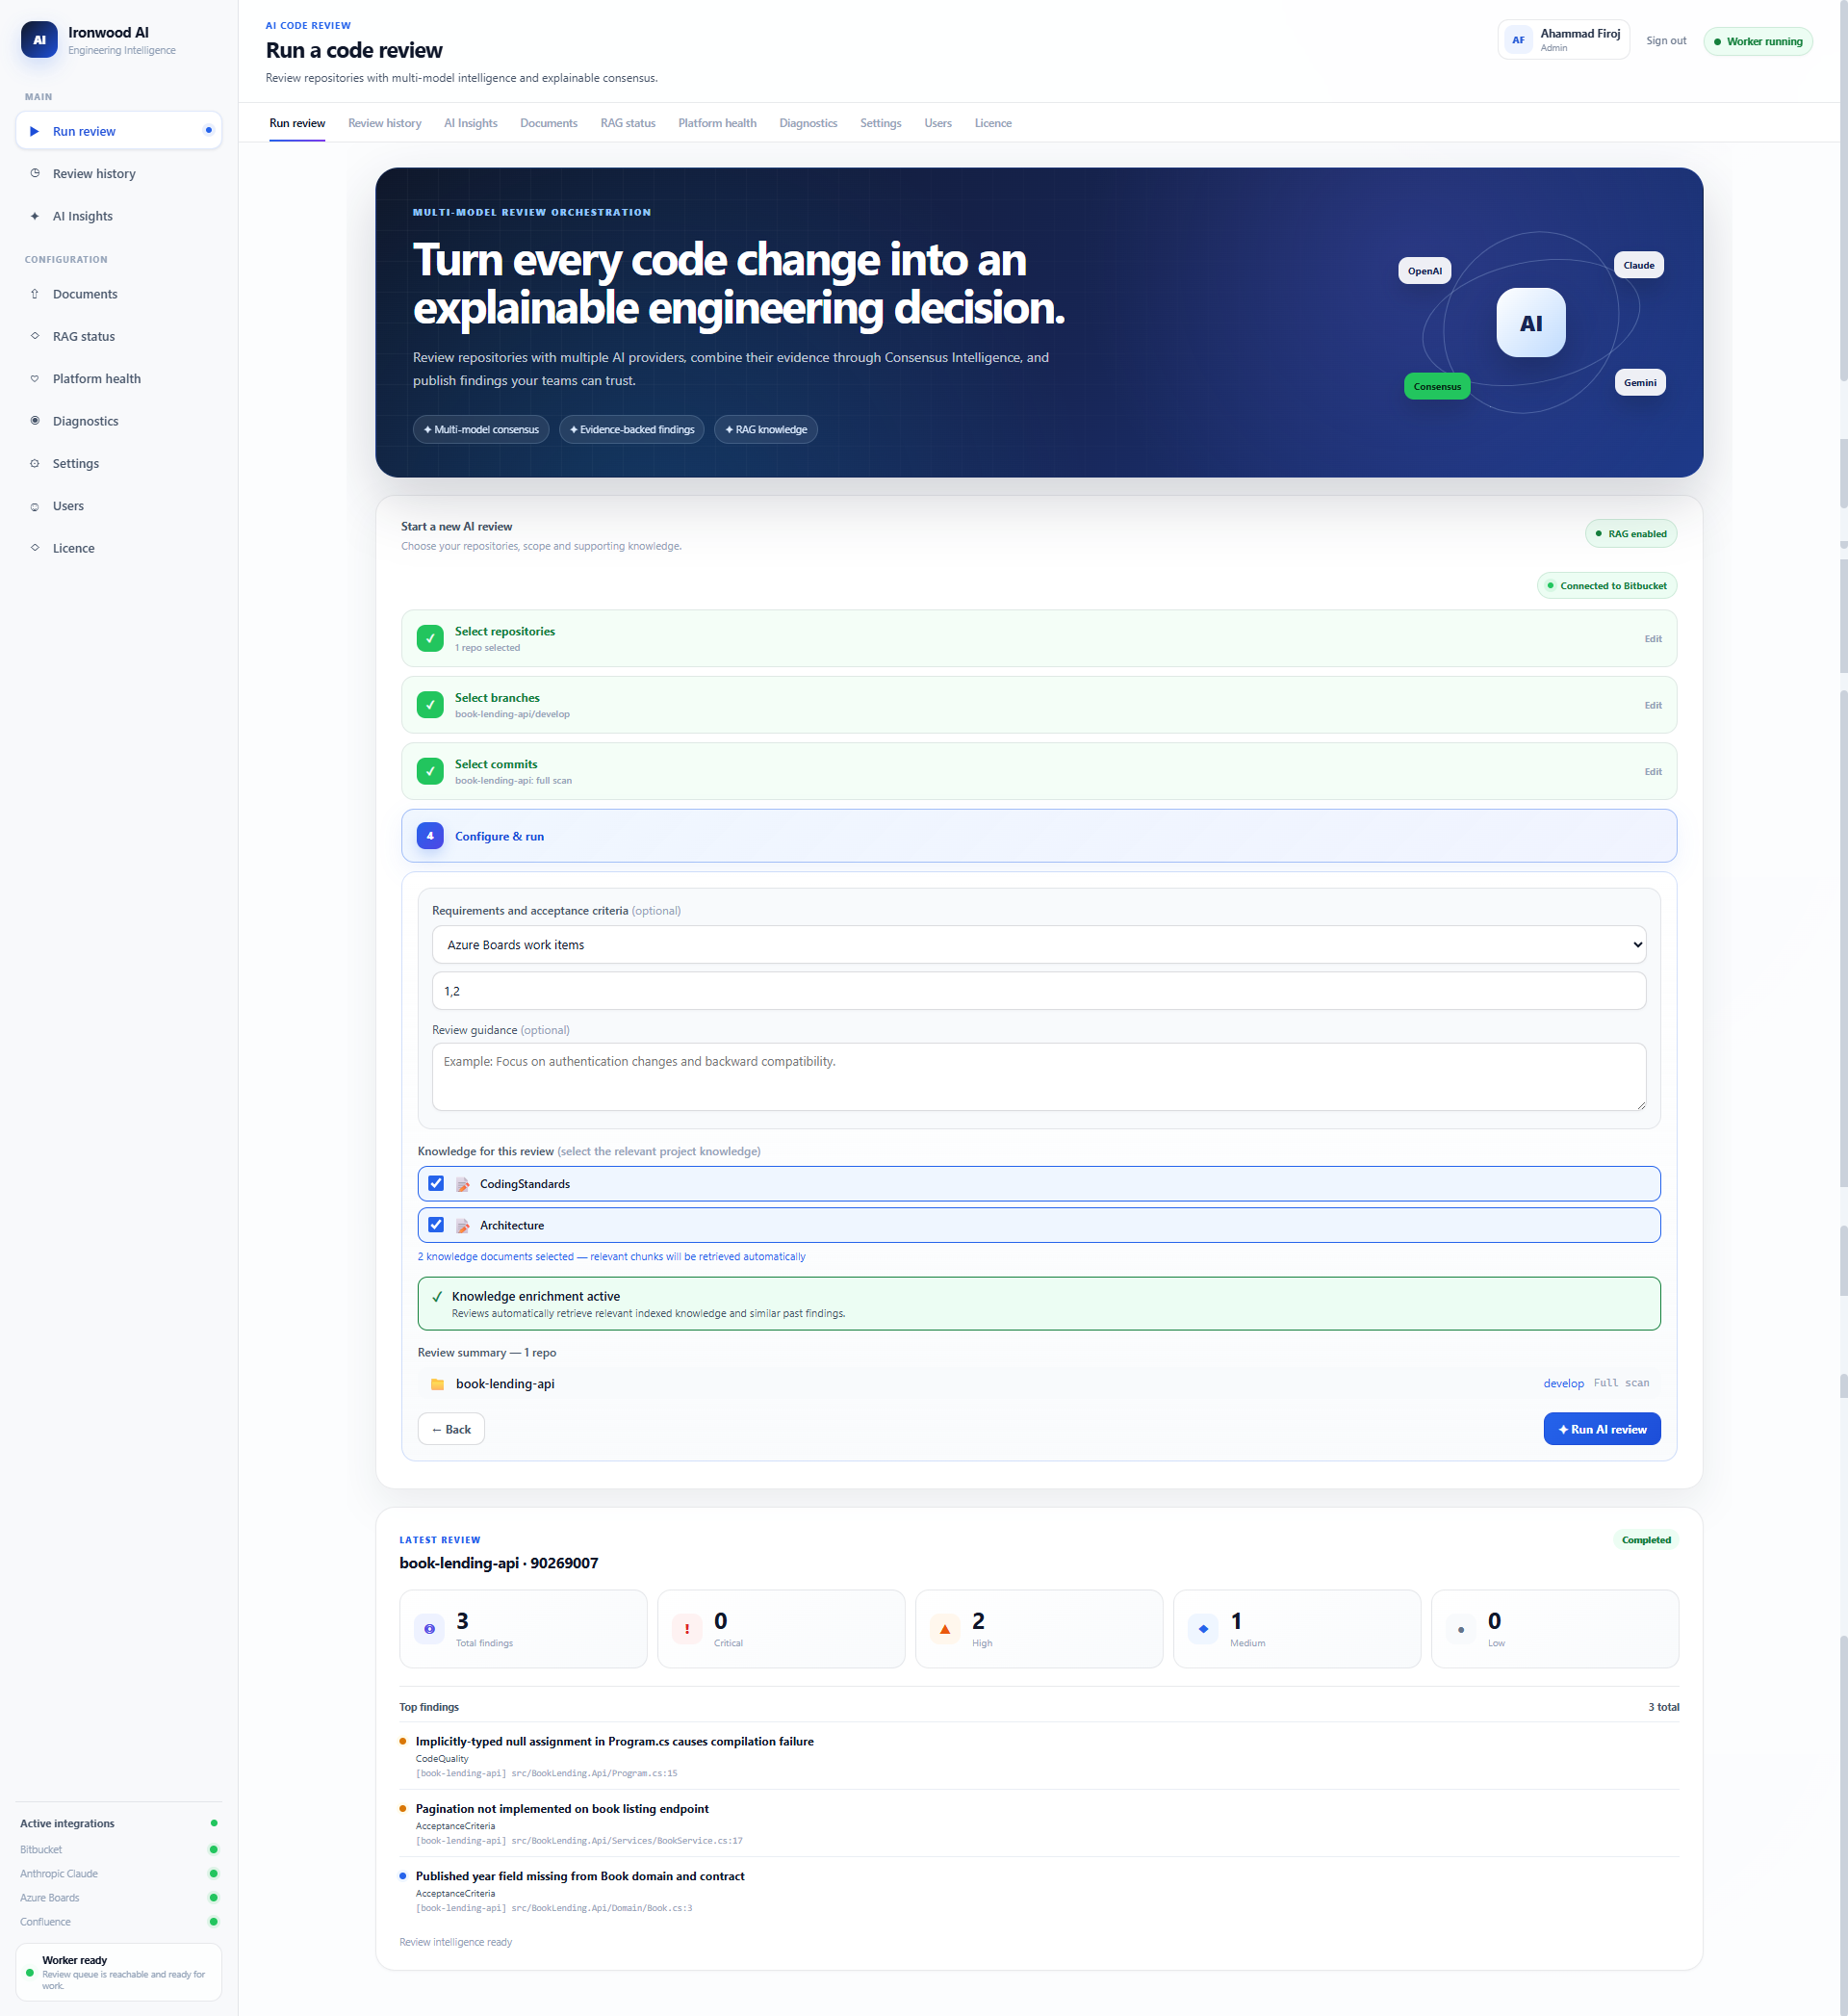
14. Run the review
Confirm the selected scope and context, then select Run Review. Ironwood runs the configured provider or Consensus workflow and stores the completed result in Review History.
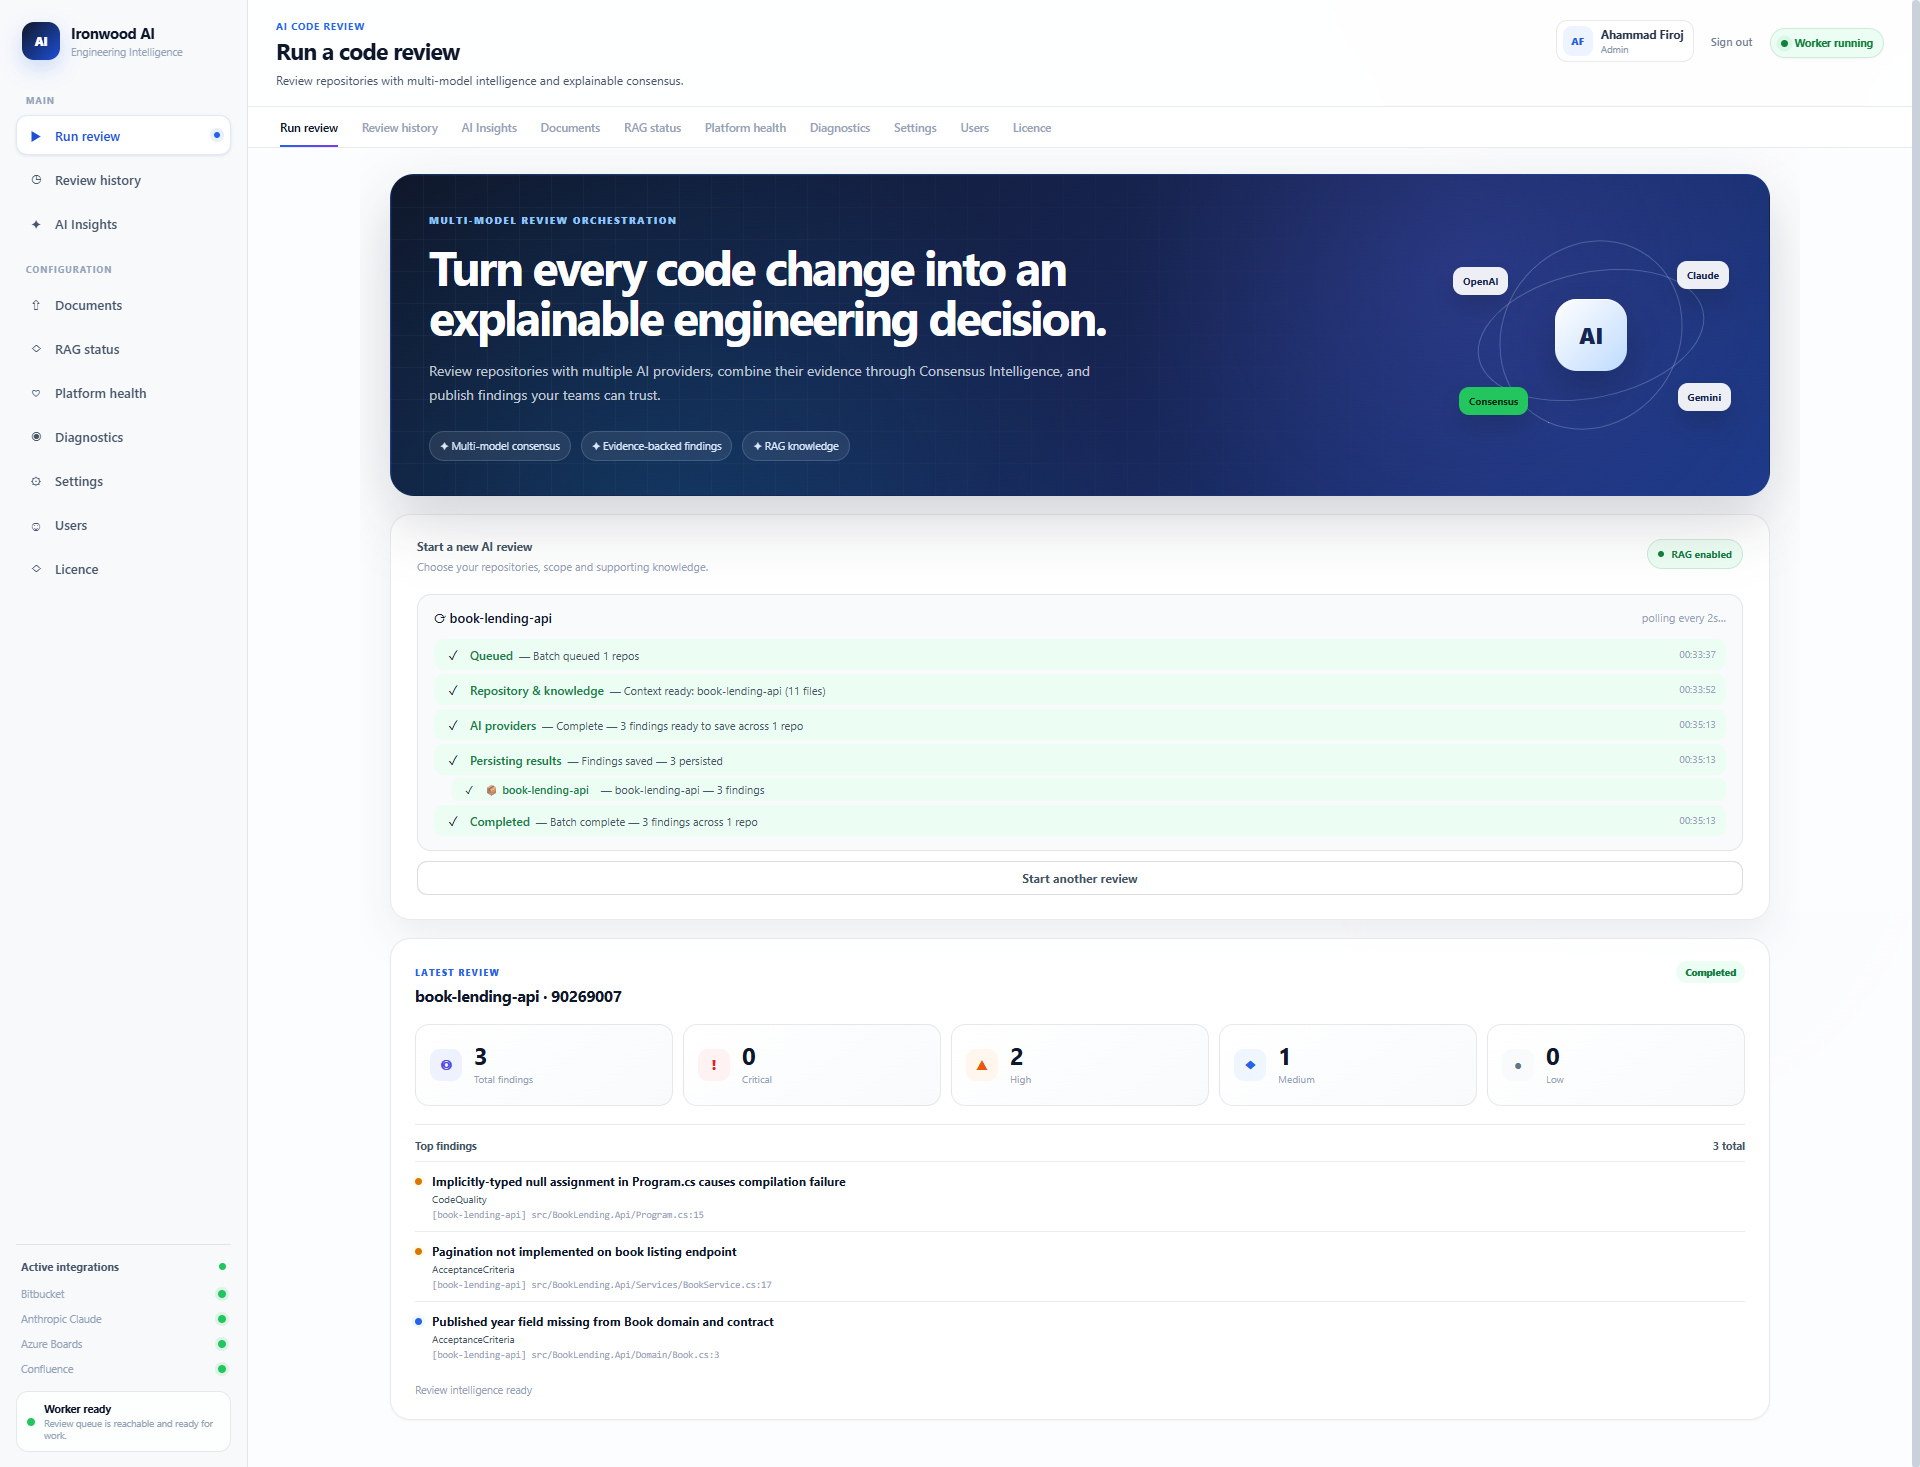
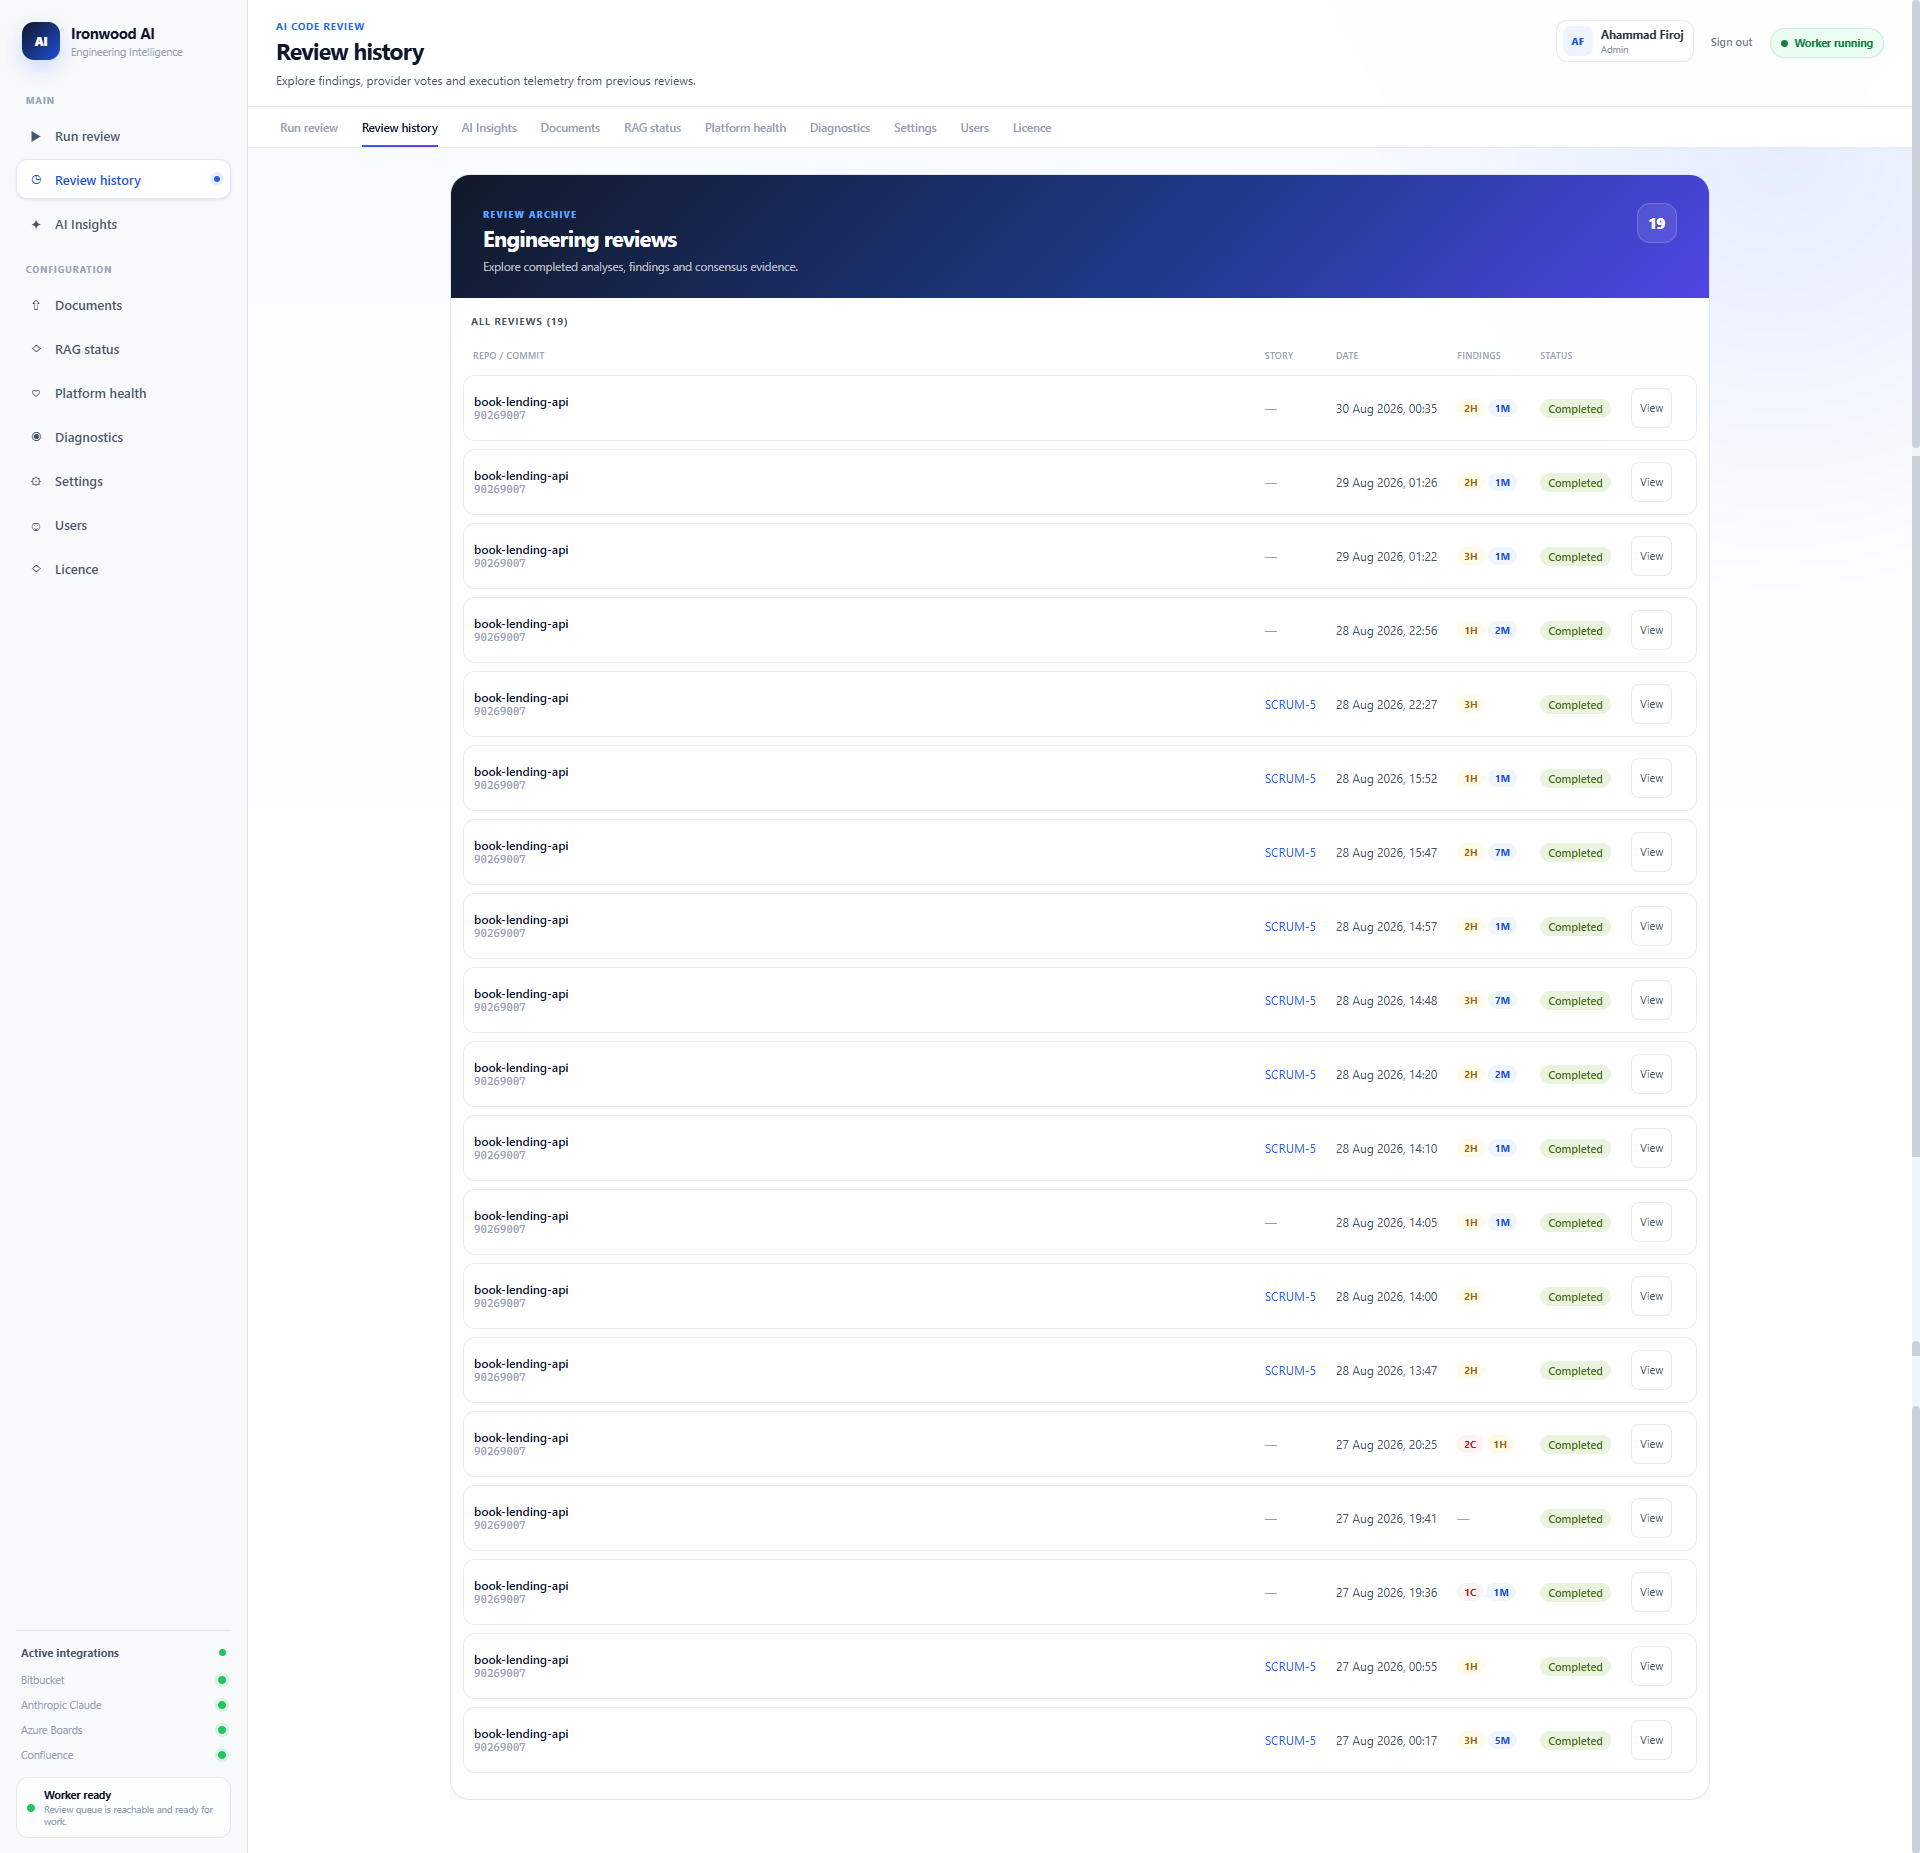
15. Open Review History
When the review finishes, open Review History. You can browse completed reviews and reopen any result you need to inspect.
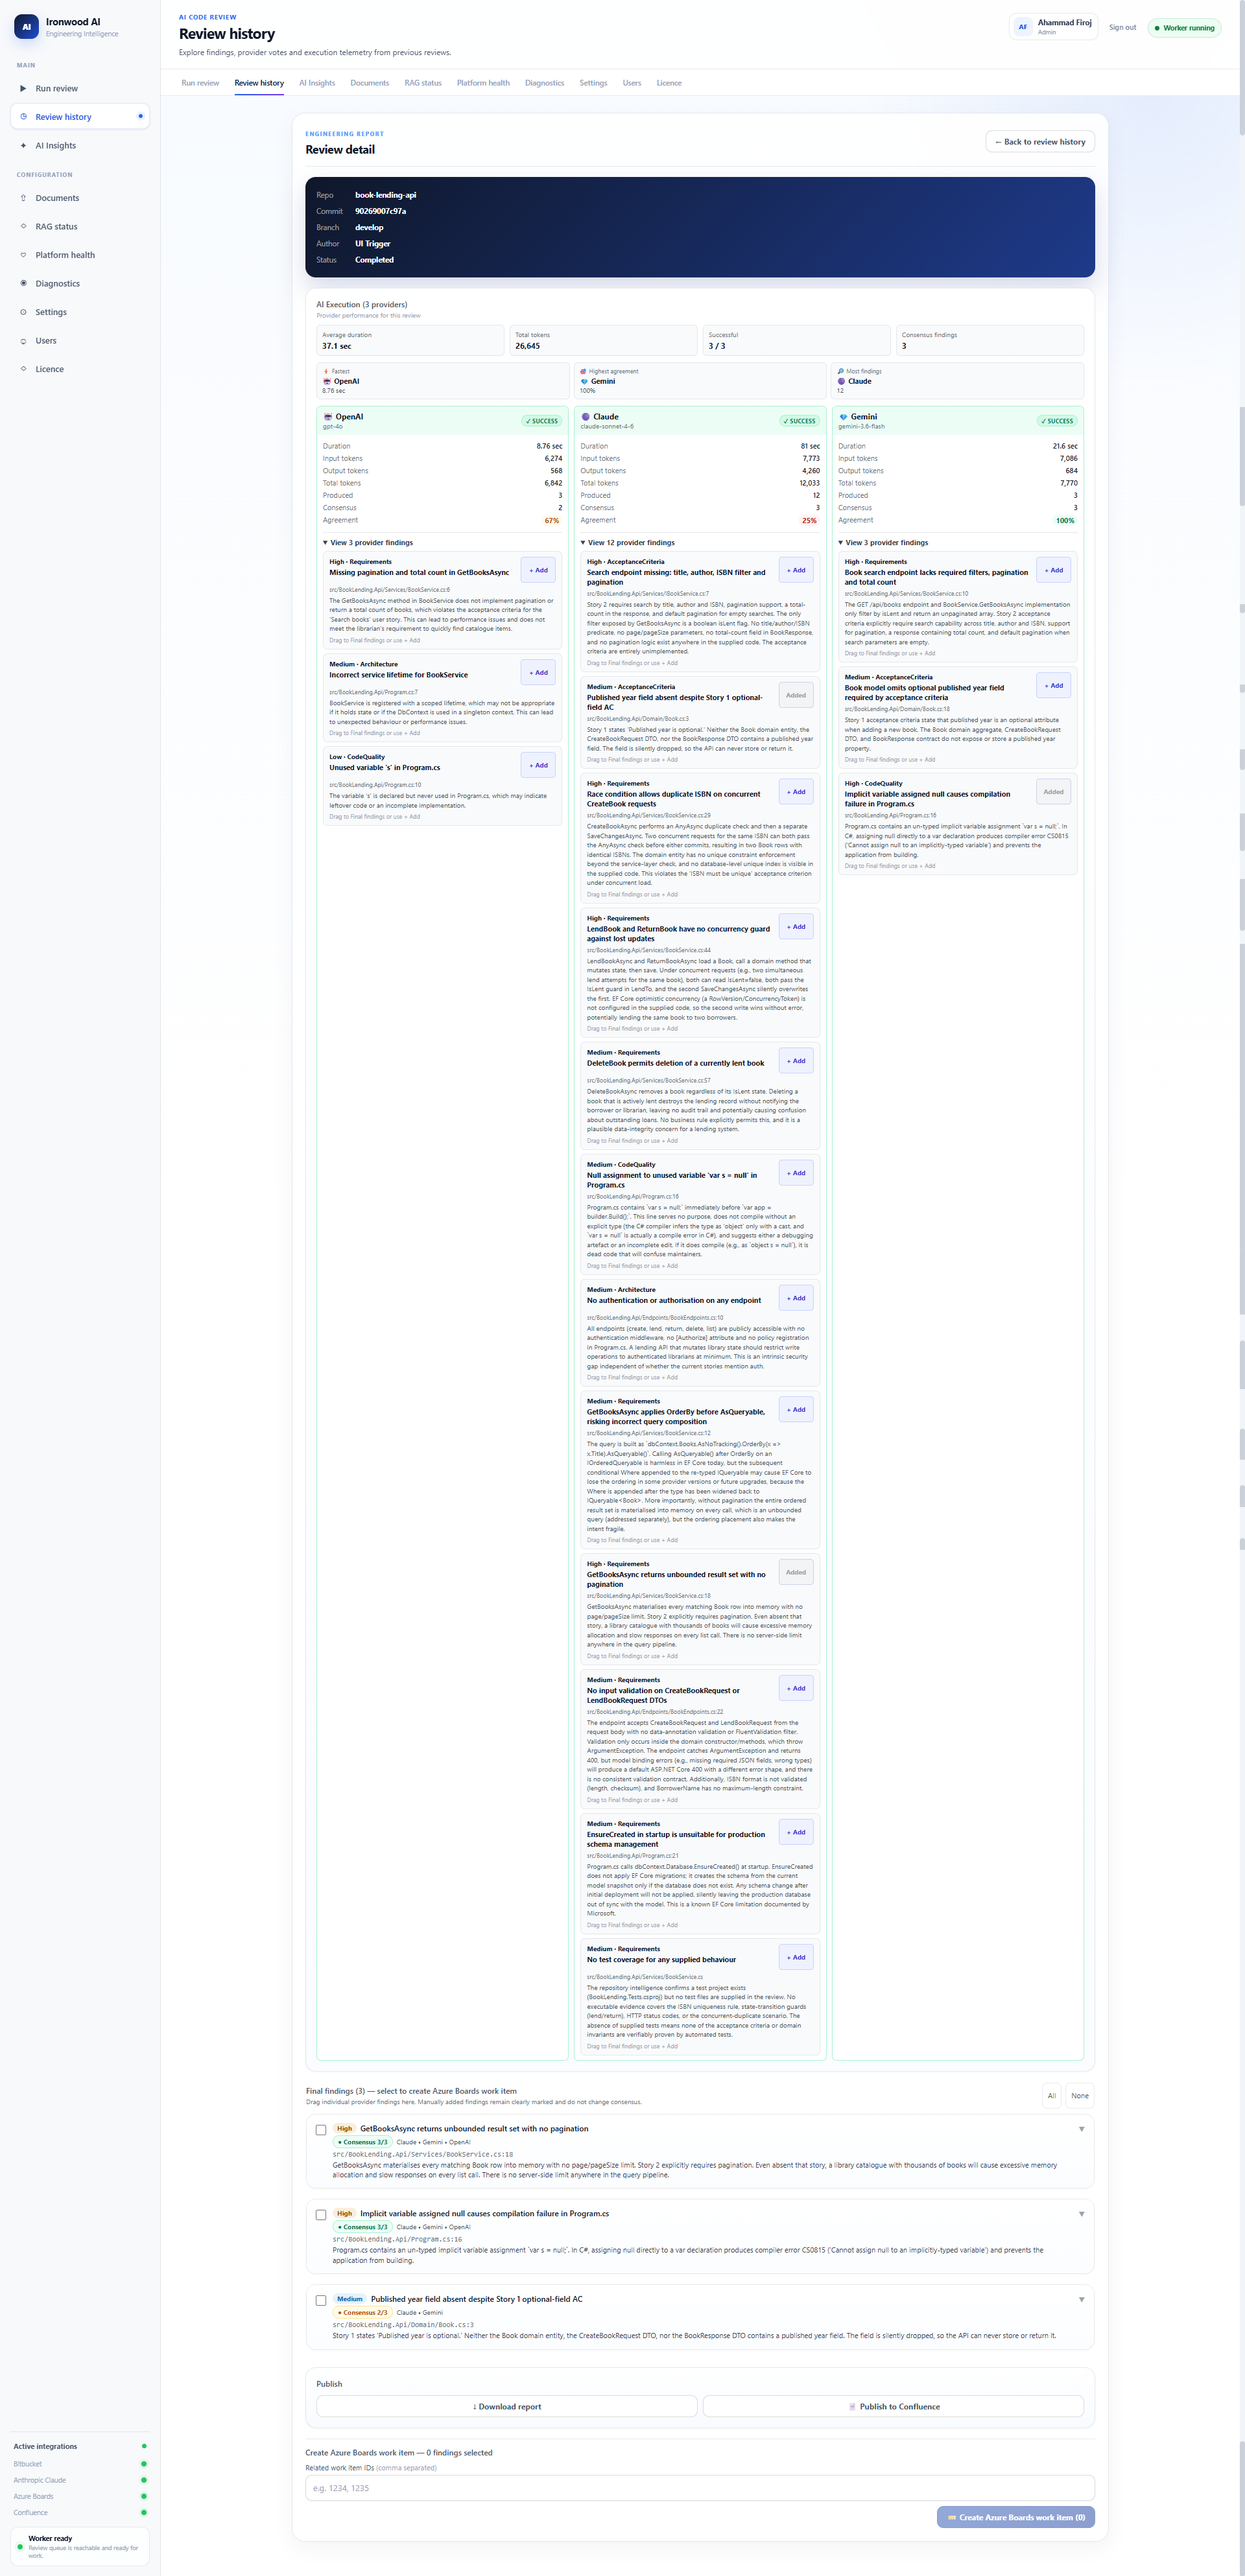
16. Review the completed result
Open the completed review to inspect the final findings, provider execution detail and Consensus evidence. Individual provider candidates remain available even when they were not automatically published. A reviewer can promote a provider candidate into the final findings when it should be included.
From the same review, use the actions available to your role and configured integrations. You can download the report, create a Jira or Azure Boards work item, or publish the review output to Confluence.
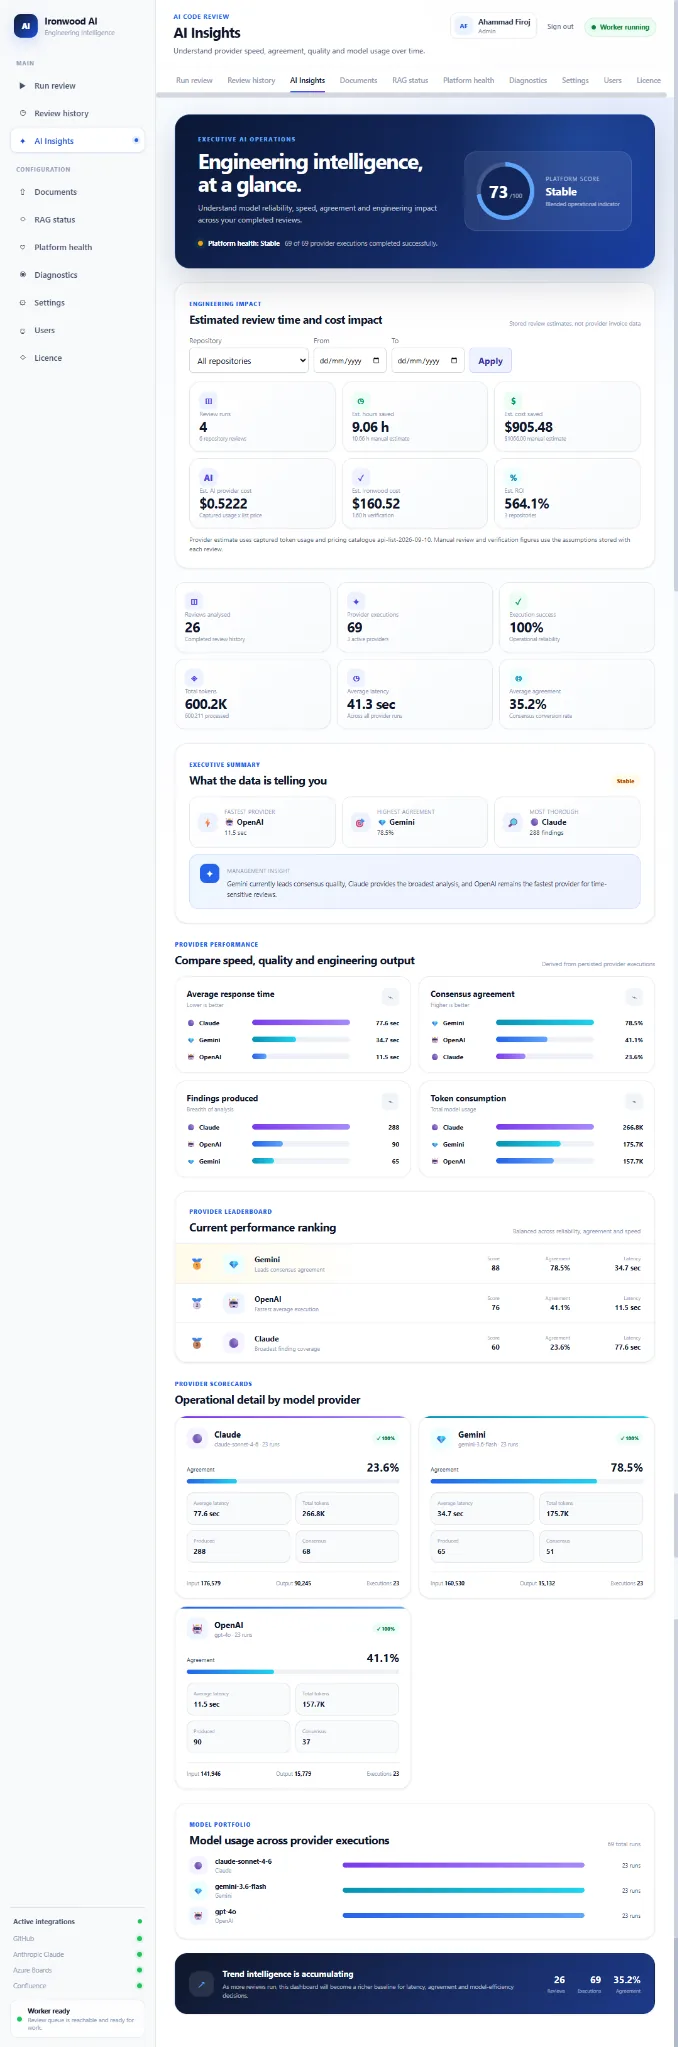
17. Check AI Insights
Open AI Insights to see estimated engineering impact across completed reviews. Ironwood uses the Review Behaviour assumptions together with captured review usage to show estimated manual review time and cost, Ironwood review cost, estimated savings and ROI. These values are estimates for engineering planning and comparison, not provider invoice data.